Author Archives: GCSDev

Try Something New: Pomegranates

Want to grow an exotic fruit that is delicious, nutritious, beautiful and incredibly hip? You really should consider planting a pomegranate! It’s not as difficult as you may think.

Why Pomegranates are Popular

Pomegranate is a stunning superfood rich in antioxidants, folic acid and vitamins A, C and E. It has no cholesterol, and is also rich in fiber and potassium. Because of these nutritional advantages, pomegranate is showing up in a multitude of supermarket products like yogurts, juices, salad dressings, jellies and desserts. It can be added to sauces, fruit crisps, salsas, relishes, dips and more. You can even make a pomegranate martini! And, of course, it’s an extraordinary experience eating a fresh pomegranate. These are stunning, delicious fruits that are rarely seen in backyard gardens, but can make a great landscaping statement when properly grown.

Growing Pomegranates in the Landscape

Pomegranates grow as multi-stemmed, small trees or large shrubs. They reach 15 feet tall by up to 15 feet wide. In spring, vibrant, gorgeous orange-red flowers grace the branches of this plant. These beautiful blossoms develop into the luscious pomegranate fruit containing dozens of tart and tangy bright red seeds and pulp. The fruit ripens somewhat square in the early fall and has a leathery skin that can be yellow to red in color.

The cultivar ‘Wonderful’ is hardy to zone 7 and is easy to grow. Plant your tree in full sun. It will thrive in the summer heat and in most soils. Pomegranates are drought tolerant, however, the fruit is better and the seeds more plump with regular deep irrigation. Because this fruit tree is self-fertile, there is no need to plant a second one for pollination.

Enjoying Your Pomegranates

If you’ve never cut your own pomegranate, it can be frustrating to learn how to separate the juicy seeds from the husk and membrane. To access the seeds…

  1. Cut off the crown of the fruit.
  2. Score the leathery husk in quarters from stem to crown end.
  3. Set the scored fruit in a bowl of cool water and let soak for a few minutes.
  4. Hold the fruit under water and break scored sections apart with your fingers, separating the seeds from membrane. The seeds will sink to the bottom of the bowl.
  5. Discard the skin and membrane.
  6. Drain the seeds on paper towels.
  7. Toss pomegranate seeds into your salad, mix them in your yogurt or smoothie or shake them into a martini and enjoy!
pomegranate-1pomegranate-2pomegranate-3

Pink Muhley Grass

Ornamental grasses are becoming increasingly popular, and there is now an over-abundance of options available at garden centers. So many choices can make the selection process difficult, even overwhelming. There is one ornamental grass, however, that takes the cake. Pink Muhley Grass is arguably the most colorful ornamental grass around and it is sure wow your friends and neighbors.

About Pink Muhley Grass

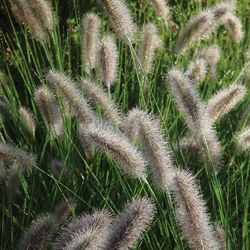
Pink Muhley Grass (Muhlenbergia capillaris) is a native grass that is deer, drought and salt tolerant. It is hardy in zones 7-10 and may be grown as an annual elsewhere. Broadly adaptable, this grass prefers sun but will tolerate part shade and will grow well in just about any soil type. ‘Regal Mist’, or also called ‘Lenca’, is a cultivar known for the deepest plume color.

Perfect used as a specimen plant in containers or in groupings in beds and borders as well as naturalized in a meadow garden, this fall bloomer is an outstanding ornamental plant. The pink-purple flower plumes that grow up to 4 feet are also exceptional for use in cut and dried floral arranging.

Proper Care

This ornamental grass is very easy to care for. Simply prune your Pink Muhley Grass clump back hard in late winter or very early spring before the attractive new growth begins to show. Although drought tolerant, the plant will be fuller and lusher with regular, consistent watering. It is especially adaptable to poorly drained soils, and can grow in full sun or partial shade locations.

In the Garden and Landscape

There are many stunning uses for this outstanding grass, whether you are cultivating a formal garden or a more relaxed landscape. Consider these popular options…

  • When not flowering, the green clump creates a textured mound acting as a groundcover or background for other smaller plants. It can also soften harsh garden corners, walkway edges or awkward intersections.
  • As a finely textured grass, plant Pink Muhley Grass with contrasting companions such as calla lilies, evergreen shrubs or low growing groundcovers to create interest in the landscape.
  • Plant in front of the larger smoketree Cotinus coggygria ‘Grace’ for an exquisite coordinating display of color and texture.
  • Plant where it will be backlit. It positively glows where it catches the early morning or late afternoon sun.
  • Use as a beautiful and unusual addition to floral arrangements.

Do you need another reason to grow Pink Muhley Grass? Oh, yes, the birds will thank you – they love the seeds!

pink-muhley-1

Begonias for the Home

Begonias are a beautiful and diverse group of plants, with more than 1,500 species. Some are suitable for use as bedding plants or in container gardens, some for hanging baskets and others for indoor cultivation. Begonias are treasured not only for their colorful flowers but also for their unique foliage, and many varieties make spectacular houseplants. 

Indoor Begonia Care 

Begonias require little care when grown indoors. They need plenty of bright light with shading from the intense afternoon sun. Comfortable indoor temperatures are advisable, 65-75 degrees Fahrenheit, and should drop slightly at night, but not below 55 degrees Fahrenheit. Begonias are very sensitive to over watering. Make certain that the soil drains well, the pot has a drainage hole and water is not permitted to stand in the saucer. It is beneficial to provide additional humidity as heating and air conditioning rob indoor air of precious moisture. The best way to increase humidity is to use a humidity tray under your begonias. Avoid misting these plants to prevent mildew on leaves. Provide adequate air circulation to ensure the foliage stays fresh without excessive dampness. 

Indoor begonias are relatively carefree if they are kept healthy. Insects that commonly affect indoor plants may also cause problems for begonias. These include mealybug, whitefly and spider mites. If leaves become crispy around the edges it is an indication that the plant requires more humidity. If the leaves yellow and start to fall off it means the plant is receiving too much water. Fertilize begonias bi-weekly with a balanced fertilizer during the growing season. Stop fertilizing during the winter months to give the plant a rest.

 If you have any questions about these or any other houseplant problems, please call or stop by our greenhouse and speak with one of our experts. 

Best Begonias for Indoor Cultivation 

  • Angel Wing Begonias
    These begonias are favored for their large, colorful, patterned, wing-shaped leaves. The flowers of this begonia are large, hang in clusters and tend to be soft in color. Angel Wings bloom in shades of white, pink, red and orange. Due to their cascading habit, these plants lend themselves well to hanging baskets but also look wonderful in larger pots. You may pinch Angel Wing Begonias to keep them at a manageable size and also to promote new canes at the base of the plant. Hang these plants outside in a semi-shaded area during the summer.
  • Rex Begonias
    Although these begonias do flower, rex begonias are grown primarily for their striking foliage. The leaves are uniquely shaped, unusually patterned, heavily textured and come in exceptional color combinations that can include green, pink, red, silver, yellow, orange, maroon and purple.
  • Rieger Begonias
    These are one of the most loved and easy to care for houseplants. The main attraction of this plant is the brilliantly colored, double or semi-double flowers in white, yellow, orange, pink and red. This plant will flower for several months and the flowers will last longer if temperatures are on the cooler side, 55-65 degrees Fahrenheit. Deadhead to encourage new blooms and extend the blooming season.
begonia-2

Rex Begonia

begonia-3

Raising Root Crops

Root crops are among the easiest vegetables to grow, and often the first and last vegetables in the garden to mature. Your garden may produce enough vegetables to take you through the entire year and, if kept correctly, root crops will last a long time in storage. These vegetables are great to grow, even in a small space. Many root crops are frost tolerant and with most, the tops, or greens, are also edible. 

What Root Crops Need 

To get the best harvest of root crops, no matter which types you opt to add to your garden, you need to meet their cultivation needs. 

  • Soil
    Root crops grow best in deep, loose, rock-free soil that will allow the roots to form and grow easily. To nourish the plants, supplement the soil with plenty of organic matter.
  • Fertilization
    Root crops require a high phosphorus fertilizer for optimum growth, but check the needs of individual crop types to choose the best mixture. Always apply fertilizer according to the proper directions to prevent burning.
  • Temperature
    Most root crops are considered cool season vegetables and are planted both early and late in the growing season. Warm days and cool nights are most beneficial for root expansion.
  • Light
    Full sun is best.
  • Planting
    Seeds should be sown 2-3 weeks before the last expected frost date and subsequent plantings made every three weeks thereafter as weather permits (some exceptions apply). Planting depth varies depending on the type of plant; follow the directions on the seed packet. After seedlings emerge, thin to desired spacing as determined by the diameter of the root at harvest time. Beet and turnip tops that are thinned are edible raw as salad greens or they may be cooked. Root crops are generally not transplantable because they have a tap root.
  • Mulch
    Mulch plants that have already been thinned with salt marsh hay to retain soil moisture and minimize weed growth.
  • Pest Control
    Maintaining appropriate cultivation requirements will reduce or eliminate the need for pest control. As with all vegetables, it is important to rotate crops each year. Rotating root crops will discourage root weevils.
  • Basic Storage
    All root crops may be stored for a time before being eaten. In general, store at 32 degrees Fahrenheit and 95 percent humidity. Leave the crops in the garden as long as weather permits, then dig. Store the harvest in a root cellar or refrigerator.

Tips for Favorite Root Vegetables 

  • Carrots – Plant in sandy soil if you want the classic, long, narrow type.
  • Beets – You may harvest 1/3 of the tops without affecting the root.
  • Garlic – Best planted in the fall.
  • Horseradish – Use caution when planting this aggressive perennial.
  • Kohlrabi – Has a mild, sweet cabbage flavor.
  • Leeks – Flavor is best if harvested after a light frost.
  • Onions & Shallots – Plant from seed or sets.
  • Potatoes – Best planted from ‘seed potatoes’ to match variety.
  • Radishes – Mature in as little as three weeks.
  • Sweet Potatoes – Warm weather root crop, will not withstand a frost.
  • Turnips – For a fall crop, sow seeds in midsummer.
raising-root-1

raising-root-2

raising-root-3

Attracting Hummingbirds

It is an awesome sight to capture a glimpse of a ruby-throated hummingbird hovering over the flower garden on a sunny summer morning. One or two a year may be seen seeking food in the landscape, sampling everything in their path. Unfortunately, they leave as rapidly as they arrive. This season, attract more of these miniature avian anomalies and keep them returning year after year. 

What Hummingbirds Want 

You can charm hummingbirds to your yard with a selection of their favorite nectar-producing flowers. Hummingbirds are not attracted by scent but by color. Red happens to be their favorite, however, pink, purple, blue, orange and yellow will also catch their eye. Tubular flowers accommodate these birds’ long, narrow bills. Select a wide variety of plants that bloom at different times to keep hummers well fed all season long. Refrain from using insecticides when attracting hummingbirds, as they rely on insects for protein in their diets – especially during the summer nesting season when young hummers need extra protein for healthy growth. 

Hanging a feeder is another way to encourage these visitors. Choose one with red parts to resemble the flowers that they prefer. Fill the feeder with a mixture of one part sugar to four parts hot water to help the sugar dissolve. Fill the feeders after the mixture has cooled. Easier yet, fill with instant nectar purchased at our store. Clean feeders every 2-3 days early and late in the season, and daily in hot weather. 

Plants That Attract Hummingbirds 

The easiest way to keep hummingbirds fed without the hassle of refilling and cleaning feeders is to provide a lush landscape filled with their favorite flowers. Fortunately, that’s easy to do because these birds will sample nectar from a wide variety of blooms. No matter what your yard size, soil type, sun exposure or moisture levels, there are plants you can add to the landscape to entice hungry hummers to stop for a snack. 

Annuals

  • Flowering Tobacco
  • Four-O-Clocks
  • Fuchsia
  • Geraniums
  • Impatiens
  • Mealy Blue Sage
  • Mexican Bush Sage
  • Nasturtium
  • Petunia
  • Pineapple Sage
  • Red Salvia
  • Zinnia

Bulbs

  • Canna
  • Gladiolus

Perennials & Biennials

  • Bugleweed
  • Bee Balm
  • Beard Tongue
  • Cardinal Flower
  • Columbine
  • Coral Bells
  • Daylily
  • Delphinium
  • Gaura
  • Hollyhocks
  • Hosta
  • Phlox
  • Spiked Gayfeather
  • Lily
  • Rose Mallow
  • Russell Hybrid Lupine

Vines

  • Cypress Vine
  • Honeysuckle
  • Morning Glory
  • Scarlet Runner Bean
  • Trumpet Vine

Shrubs

  • Azalea
  • Butterfly Bush
  • Glossy Abelia
  • Lilac
  • Weigelax

Trees

  • Bottlebrush Buckeye
  • Catalpa

Fun Hummingbird Facts 

Why not learn a little more about these fascinating birds? The more you know about their amazing abilities and unique characteristics, the more you’ll appreciate having them visit your yard! 

  •  Hummingbirds are the smallest birds in the world.
  • There are over 340 species of hummingbirds and they are found only in the western hemisphere. Most species are found in the tropics.
  • Hummers can hover as well as fly straight up and down, sideways, backwards and even upside down.
  • Hummingbirds beat their wings about 75 times per second.
  • They can drink eight times their body weight and consume about 500 insects daily.
hummingbird2

hummingbird3

hummingbird1

Tomatoes and Peppers – A Gardening Tradition

Tomatoes and peppers are two crops you can never have too much of. They freeze well without the difficulty of blanching, and although the texture of tomatoes disintegrates, the flavor remains good. Both tomatoes and peppers offer brilliantly colored fruit that can be particularly attractive in the garden or in containers. Both have the same requirements – a sunny, nutrient-rich site that is well-drained. To prevent disease problems, neither should be planted in a location where tomatoes, peppers or eggplants were grown the previous year. If you’re not growing both tomatoes and peppers, you’re missing out! 

Tomatoes 

Tomatoes come in two different types: determinate and indeterminate. Determinate, or bush varieties, grow 1-3’ tall. When flowers form at the vine tips, the plant stops growing. This means fruit sets all at once – which makes them excellent for canning. Indeterminate types, on the other hand, have sprawling vines that grow 6-20’ long, and keep producing and growing until frost. Indeterminate vines should be pruned to ensure that they do not put too much energy into vine production. Pinch out sideshoots (“suckers”) as they develop to prevent excess growth and encourage more fruit. 

Tomato plants should be set deep in the soil with the first leaf just above ground level. Leggy plants can even be planted horizontally as roots will develop from the planted stem. 

Blossom-end rot can be a common problem with tomatoes. It is a leathery scar that develops on the bottom of the fruit. This is caused from a deficiency of calcium and/or irregular watering. To ensure a supply of calcium, work gypsum into the soil before planting and maintain regular watering. Feed tomatoes once a month with Garden-tone or use Miracle-Gro weekly. Apply mulch around all vegetable plants to help keep the soil moist and cool. 

Another disease, early blight, makes dark, depressed areas on the leaves just as first fruit appears. Late blight appears as black, irregular, water-soaked blotches on leaves and dark-colored spots on fruits. Both diseases usually occur during cool, rainy weather. Destroy plants to keep from infecting other plants and select resistant varieties to minimize future outbreaks. 

Spread by aphids, tobacco mosaic virus will appear as yellow, mottled foliage with fruit possibly being stunted. Severely affected plants should be destroyed. Aphids should be controlled to prevent infection. 

Peppers 

Ranging in selections from crispy sweet to fiery hot and from big and blocky to long and skinny, peppers should be cut from the plant rather than pulled off. Most sweet peppers become even sweeter when they mature as they turn from green to bright red, yellow, orange or even brown or purple. As hot peppers mature and turn red, they get hotter. 

Peppers are also susceptible to blossom end rot and tobacco mosaic virus the same as tomatoes. The same measures should be taken to prevent infection. 

Although we’ve touched on the most common problems with tomatoes and peppers – if you’re not sure, bring in a sample to let one of our experts correctly diagnose the problem and help you find a solution. 

Types of Tomatoes & Peppers 

Tomatoes

  • Beefsteak – Large slicer
  • Better Boy (VFN) – Medium
  • Big Beef – Large slicer
  • Big Girl (VF) – Medium
  • Celebrity (VFNTA) – Medium
  • Champion (VFNT) – Large
  • Early Girl (VF)- Medium, early
  • Husky Gold (VF) – Medium yellow
  • Husky Red (VF) – Medium
  • Lemon Boy (VFN) – Yellow
  • Patio – Self-supporting, medium
  • Roma (VF) – Medium
  • Sunray – Yellow
  • Supersonic – Medium to large
  • Supersteak – Large slicer
  • Sweet 100 – Cherry

Notations after the tomato variety designate their resistance to the following diseases: V-Verticillium, F-Fusarium, N-Nematodes, T-Tobacco Mosaic, A-Alternaria 

Peppers

  • Biscayne Italian Fryer – Sweet
  • California Wonder – Sweet
  • Cherry Hot – Hot
  • Cubanelle – Sweet
  • Golden Bell – Sweet
  • Habanaro – Hot
  • Hungarian Wax – Hot
  • Italian Gourmet Fryer – Sweet
  • Ivory Bell – Sweet
  • Jalapeno – Hot
  • Jupiter Green – Sweet
  • Lady Bell – Sweet
  • Lilac Bell – Sweet
  • Long Hot Cayenne – Hot
  • Mandarin (Orange Bell) – Sweet
  • Sweet Banana – Sweet

In The Kitchen 

There are hundreds of delicious recipes to try with either tomatoes, peppers or both at once, whether they are fresh or canned. Try this favorite tomato recipe, and use your strong crops of both of these fruits to experiment with different flavors and tastes all year long! 

Scalloped Fresh Tomatoes

  • 1 medium onion, chopped
  • 2 Tbsp butter or margarine
  • 4 medium, ripe tomatoes, sliced
  • 1 cup grated sharp cheese
  • 1 cup fine, soft bread crumbs
  • 1 cup dairy sour cream
  • 2 eggs, well-beaten
  • ½ tsp salt

Cook onions in butter until tender. Place half the tomatoes in a 10 x 6 x 11 ½” baking dish. Top with half each onions, cheese and crumbs; repeat. Mix remaining ingredients. Pour over top. Bake at 350 degrees for 35-40 minutes. Serves 4-5.

tomato-pepper-2

OLYMPUS DIGITAL CAMERA

Espalier

Espalier is the process of training trees or shrubs, by pruning and trellising, to create a vertical, two-dimensional, formal pattern. The purpose of espalier is to artfully train a tree to grow in limited space, to provide pattern and texture on a solid wall, to grow fruit in a limited space and to create privacy in the garden.

It is possible to purchase plants that have been already been espaliered, however, your selection of plant choices will be limited and it’s not nearly as much fun as doing it yourself. Fortunately, it’s not as hard to do as it may sound!

Espalier Basics

To begin, choose a spot in full sun where you have garden space at the foot of a bare wall or fence. It is important to remember to leave about 6 inches of space between the wall or fence and the plant to allow sufficient room for roots to grow. A wire frame is often used in place of a trellis when choosing this type of plant training, though a trellis may be used when training a plant for privacy when no wall is available. Screw eyebolts into the side of a building at 1-foot intervals, horizontally and vertically. Tie wire between the bolts to create a grid. There are many styles and patterns, of espalier to choose from, some simple, some complicated. It may help to layout your design on graph paper first to solidify your plan and to visualize its complete form.

Select a tree that is young as its branches will be more flexible and more readily trainable. All branches must be pruned from the side that will be flush with the wall or trellis. Tie the main trunk to the wire grid with a twist tie, then prune away all branches that grow forward leaving only laterally spreading branches. Next, begin tying the lateral branches to the frame at approximately a 45-degree angle from the ground. You now have the beginnings of an espalier! This process will require annual maintenance. Branches chosen to be part of your original design should be retrained and retied yearly. Check the ties twice a year to make sure that they are not strangling the branches, and loosen them as necessary. Branches that are not needed to maintain your design should be removed.

Pruning Your Plant for the Best Espalier

Pruning and training will continue throughout the life of your chosen plant. Generally, most major pruning is done in late winter to early spring before new growth begins, but pruning at different times can have different advantages. Pruning during the dormant season or early spring, for example, will stimulate new growth that can help fill a pattern in more quickly. Pruning in mid-summer (June, July) tends to have a dwarfing effect, ideal to keep a more mature plant under control in a smaller space. Pruning should not be done in late summer, however, as this could stimulate new growth that will not have time to harden off before a heavy frost sets in.

An espalier design can take years to fill into a luxurious form, but the effort and meticulous nature of this type of plant training can be well worthwhile for a unique and eye-catching feature in your garden.

Apple Fruit.

Creepers & Crawlers: Ground Covers for Walkways

The durability of some plants is absolutely amazing. A number of them are so robust that they may even be tread on! These are the plants to choose when filling in the space between pavers, walkways, patios and steps. Placing plants in the gaps of your hardscape will soften its appearance and will keep weeds from taking over that space, as well as prevent erosion that will loosen stones. These ground covers will creep and crawl around the stone bringing the garden to your feet and closer for you to enjoy. 

There are resilient, low-growing, easy maintenance plants for just about any situation. Many even have showy flowers. But which is right for your yard? Before planting, scope out your site. Take into consideration the amount of sun or shade the plant will receive, the amount of foot traffic the area gets and the size of the space that the plant needs to fill. Still not sure which groundcover will work best? Stop in and speak with a member of our knowledgeable staff. We can help make your selection easier. 

Groundcovers for Moderate to Heavy Foot Traffic 

Areas that receive moderate to heavy foot traffic – backyard patios, front walkways, terrace steps, etc. – can be the most difficult to fill in. Depending on the light the site receives, some of the most popular groundcover options include… 

Full Sun 

  • Alpine Cinquefoil (Potentilla) – 12” spread, yellow flowers, green foliage
  • Carpet Speedwell (Veronica) – 3” spread, light blue flowers
  • Creeping Sunshine Speedwell (Veronica) – 12” spread, gold foliage
  • Creeping Thyme Doone Valley (Thymus) 23” spread, variegated gold foliage
  • Creeping Thyme Purple Carpet (Thymus) 18” spread, mauve flowers
  • Creeping Thyme Elfin (Thymus) –  8” spread, light pink flowers
  • Creeping Thyme Coccineus (Thymus) –  18” spread, red flowers
  • Creeping Thyme Pink Chintz (Thymus) 23” spread, deep pink flowers
  • Creeping Thyme Ruby Glow (Thymus) –  18” spread, purple-red flowers
  • Golden Stonecrop (Sedum) – 23” spread, yellow flowers and foliage
  • Hartington Silver Thyme (Thymus) 12” spread, light pink flowers
  • Mediterranean Creeping Thyme (Thymus) – 18” spread, deep pink flowers
  • Nutmeg Thyme (Thymus) – 18” spread, scented foliage
  • Orange-scented Thyme (Thymus) – 12” spread, scented foliage
  • Pink Pussy-toes (Antennaria) – 12” spread, deep pink flowers
  • Pussy-toes (Antennaria) 12” spread, white flowers
  • White Moss Thyme (Thymus) – 18” spread, white flowers
  • Whitley’s Speedwell (Veronica) – 23” spread, deep blue flowers
  • Woolly Thyme (Thymus) – 23” spread, grey-green foliage

Sun to Part Sun 

  • Blue Star Creeper (Isotom) 12” spread, light blue flowers
  • Black Brass Buttons (Leptinella) 12” spread, purple-black foliage
  • Black-Leaved Clover (Trifolium) – 18” spread, green and purple foliage
  • Celestial Spice Pratia (Pratia) 8” spread, deep blue flowers
  • County Park Pratia (Pratia) – 12” spread, deep blue flowers
  • Creeping Mazus (Mazus) – 18” spread, mauve flowers
  • Creeping Wire Vine (Muehlenbeckia) – 29” spread, wiry stems
  • Cushion Bolax (Azorella) – 8” spread, yellow flowers
  • Green Brass Buttons (Leptinella squalida) – 12” spread, yellow flowers
  • Irish Moss (Sagina subulata) – 12” spread, small white flowers
  • White Creeping Mazus (Mazus) – 18” spread, white flowers
  • Miniature Brass Buttons (Leptinella) – 16” spread, white flowers
  • Rupturewort (Herniaria) – 12” spread, tiny leaves
  • Scotch Moss Golden (Sagina) 12” spread, golden foliage
  • Turkey Tangle Fogfruit (Phyla) 23” spread, gray-green foliage
  • White Creeping Pratia (Pratia) 12” spread, white flowers 

Shade 

  • Corsican Mint (Mentha) – 12” spread, mauve flowers
  • Miniature Creeping Jenny (Lysimachia) – 18” spread, yellow flowers
  • Miniature Wintercreeper (Euonymus) – 18” spread, leathery foliage
Off The Beaten Path

Holey Moley, Shrew or Vole!

Mole, vole or shrew: ever wonder what the difference is between these pests, or why you should care? All three of these mouse-like creatures may be seen in or around your garden. Identification is important in determining if and how you should control these critters.

Moles

  • Identification: A mature mole will grow 5-7 inches from snout to tail. Moles have soft, thick, velvety-gray fur, a long, blunt snout and an approximately 1-inch long tail. Their eyes and ears are inconspicuous, hidden under their fur. Their paddle-like front paws are two to three times wider then their rear paws.
  • Damage: Moles, in search of grubs, beetles and earthworms, burrow in the ground and create tunneling in the lawn and garden. They surface occasionally leaving small hills of loose soil. Moles are solitary, subterranean creatures.
  • Control: Reduce food supply by controlling grubs in the lawn. Use repellents containing castor oil, or toxic baits placed in the tunnel but out of reach of pets. There are several different styles of mole traps available on the market.

Voles

  • Identification: Voles, often called meadow mice, are a little larger than moles reaching 5-8 inches long at maturity. Their heads are rounded, their eyes are larger than shrews, their fur is brown, short and smooth, their front paws are about the same width as their rear paws and their tails are about 1 ¾ inches long.
  • Damage: Voles are herbivores that feed on bulbs, tubers and tender young plants. During the winter, often under the cover of snow, voles will eat surface roots and chew bark from the base of trees and shrubs often causing the plant to girdle and die. Voles, unlike moles and shrews, are social and where you find one, you will find many. Voles will often tunnel in mulch or ground cover above ground leaving surface trails. They sometimes run through old mole tunnels eating plant roots.
  • Control: Use Thiram-based repellents. Set up mouse traps baited with peanut butter or apple slices. Keep mulch away from tree trunks. Remove snow from the base of trees and shrubs in the winter. Protect young trees by wrapping the lower trunk in wire mesh. Apply predator urine to the area and reapply frequently. Do not use poisons.

Shrews

  • Identification: A mature shrew will reach 4-5 inches long. Shrews have a thin tail about 7/8 of an inch long, soft, grey, short fur, small beady eyes, small ears and a pointed snout.
  • Damage: Shrews, like moles, are insectivores. They eat earthworms, grubs and other insects. Shrews, however, are often seen above ground although they tend to use old mole and vole tunnels to get around. Shrews cause no real damage to plants and eat a variety of insects making them beneficial in the landscape and garden.
  • Control: None necessary.

Not sure what to do about these pesky garden visitors? Stop by to see our complete line of safe, effective pest control products and to ask for expert consultation about which visitors should be welcome in your garden and which ones you should gently encourage to leave.


Trackable Tools

It’s the beginning of a new gardening season. Hopefully you took out last year’s journal in January or February and reviewed your notes on what you wanted to change, improve, experiment with or eliminate from your garden and landscape. Now is the time to begin implementing some of those great ideas, and it starts with having the right tools.

Where Do Your Tools Go?

One common problem in the garden is misplaced tools. We’ve all found hand tools in the spring that were inadvertently thrown in the compost pile or left under a shrub during fall cleanup. Many of us have spent time we didn’t have to spare walking in circles, looking for the shovel that we just had in our hand. It was laid down for a moment and seemed to disappear. Tools can easily disappear on a crowded workbench or in a cluttered shed, or they may even end up in a brush pile or other unlikely location.

When tools are lost, not only are our gardening chores impacted, but the tools can be damaged by exposure or accidental damage if they’re dropped, run over with a mower or otherwise subjected to inadvertent abuse. This can mean we no longer have the tool we need when we need it most, and we have to make a trip to the garden center to replace a tool – using time and money our gardening budget may not have.

Finding Your Tools

Let’s do things differently this year. Let’s save time, money and our precious tools. Resolve to only buy new hand tools with bright colored handles that are easily seen from afar and stand out to be picked up after a long day in the garden. If you already have a good selection of tools that you love and wish to keep track of, simply cover the handle with a bright colored spray paint on a sunny spring day, or wrap the handles with brightly colored tape or other coverings to make them more visible.

Similarly, take the time to clean out and declutter your garden shed, tool boxes and workbenches, making sure there is a safe, appropriate place to store every tool. If each tool has a place, you’ll be able to see at a glance when a tool may be missing and you can find it quickly before you’ve forgotten where you saw or used it last.

You and your garden will be glad you did!

trackable_tools_1