Monthly Archives: March 2025

Spring Lawn Renovation

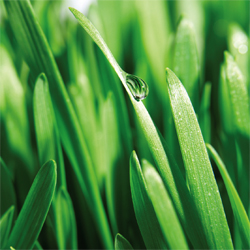
Spring is the ideal time to spruce up your lawn. After a long winter, you can easily see where any bald, bare or thin patches exist, as well as where weeds or fungus may be taking over the lawn. Fortunately, there are easy ways to set your lawn to rights!
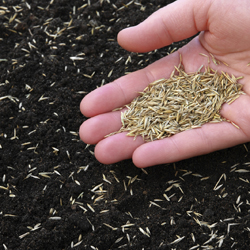
Seeding

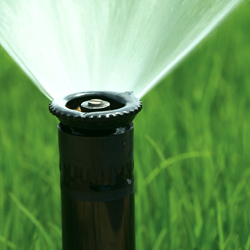
If you are planning to seed a new lawn or overseed an existing lawn, it is best to seed as early as possible. It is important to get seed germinated and growing before trees begin to leaf out, when the trees will be usurping more of the soil’s moisture and nutrition and new leaves will block sunlight from the grass seed. This is especially true in more heavily shaded areas. Keep the area moist at all times until the roots of grass seed become established, then you can gradually decrease the frequency of watering. The new grass can be mowed when it reaches a height of about three inches.

Rejuvenating a Weak Lawn

Your lawn cannot live without air, water and nutrients, but decaying material matted down between grass blades can smother even the healthiest-looking lawn. This decaying material is called thatch, and when a thick layer of thatch builds up, water and fertilizer may run off instead of penetrating the soil. Aerating and dethatching can help rejuvenate a lawn by restoring passageways to the soil. Late spring is an excellent time to dethatch cool-season grasses. Thatching rakes can be used, or you can use a metal rake to remove thatch by hand.

Adusting pH 

The pH of your soil has a direct impact on the health of your lawn. Test your soil to determine the pH (simple kits are available to do this). We recommend a small handful of soil taken from a depth of 3 inches to get the most accurate reading. At a pH of 6.8-7.0 nutrients are most readily available to turf grasses, and beneficial microorganisms are more active to decompose thatch and keep the soil structure healthy. If your pH is too low or too high, consider amending the soil as needed to help bring it to a more desirable level.

Crabgrass Control

On established lawns that you are not overseeding, apply a fertilizer with crabgrass control in early to mid-April. Straight Team products can be applied with separate fertilizers like Espoma Organic 18-8-6 or similar fertilizers. Reapply Team in early to mid-June for the second germination of crabgrass. Remember, crabgrass seeds start to germinate when the soil temperature reaches 50-58 degrees. Use corn gluten as an organic alternative for crabgrass control on an established lawn.

On newly seeded lawns and those seeded in late fall or during the winter months, use a starter fertilizer with crabgrass control. You will need to reapply in four weeks or however the manufacturer’s instructions indicate. Proper applications will keep your new lawn crabgrass-free.

Maintaining your lawn at a higher level, 4 inches, throughout the growing season will allow you to control crabgrass without the use of chemicals. Taller grass will shade out the crabgrass seed preventing it from germinating.

Insect Controls

An early season application of Merit or a similar insecticide will provide effective white grub control for the growing season. This preventative method tends to give better results than applying insecticides when you notice damage as it then may be too late. If you have routinely had problems with other insects, opt for products specifically targeted for those pests to ensure effective control.

A lot goes into having a lush, healthy lawn, but if you take the appropriate steps to rejuvenate your lawn in spring, you’ll be rewarded with thick, healthy, resilient turf to enjoy from early spring until snow flies again.

spring_lawn_3

spring_lawn_1

Grass sprinkler

Pruning Forsythia

Forsythia is a true spring favorite and never disappoints with its shocking yellow blooms atop a mass of unruly branches. This early-flowering shrub can thrive for decades on neglect but there will come a time, whether out of want or necessity, that your forsythia will require pruning. But how can you do so without dampening the ferocious spring flame these spring shrubs produce?

Why Prune Forsythia?

When this shrub does so well without detailed care, why is it necessary to prune it at all? In many landscapes, if the shrub is properly sited, it may not need pruning. Unfortunately, many people underestimate the vigorous growth of these beauties, and in just a few years it may seem crowded and overgrown in a corner, narrow bed or border. A large, unruly forsythia may also seem overwhelming in a smaller space or when paired with less vigorous plants. Damage or illness may also create a misshapen or unbalanced plant that is no longer so pleasing to the eye. In these cases, judicious pruning can rejuvenate and refresh the shrub and give new life to its part of the landscape.

Rejuvenating Forsythia

Rejuvenating an old, out of shape and poorly flowering forsythia is simple. After the shrub has finished flowering in late spring, cut all the branches back to within one foot of the ground. When branches put on new growth, reaching two feet from the ground, prune all branch tips to the first set of side shoots. This will help develop a fuller, thicker shrub for a more lush look. Be aware, however, that it will take until the second bloom season for a severely pruned forsythia to return to its former splendor.

A newer forsythia that is just a few years old can be kept in tip-top shape a bit more easily. Each spring, after it flowers, cut up to one-third of the branches back to the ground. Choose dead branches, branches thicker than your thumb and all crossed or inward facing branches. This will help create a good form with healthy air circulation and pleasing growth for years of beauty and enjoyment.

It’s easy to keep forsythia looking stunning for many years. Whether you want to make the most of the forsythia already in your yard or want to add this beauty to your landscape, stop by – our landscaping experts can help you choose the best species for your yard and needs so you can enjoy its beauty for many springs to come.

forsythia-1

Azaleas – An American Favorite

Azaleas are true garden favorite and are popular in all types of landscape designs. To keep them blooming prolifically and as beautiful as they can be, however, you will need to follow a few special directions for their best care.

Planting Azaleas

Azaleas need a well-drained location, as they will not thrive in an area that stays overly wet. They prefer afternoon shade, and too much sun can harm their leaves and fade the flowers, depleting their beauty. For their best growth, it is important to shelter azaleas from drying winds. The best locations in the landscape will be along the north, northeast or east side of a building or stand of evergreens or in the filtered shade under tall trees.

Azaleas may be planted any time of the year, even when in full bloom. Spring and early fall are ideal planting times so the plants are not stressed by the heaviest summer heat. Before planting, loosen the matted roots with a hand cultivator so they can spread and establish more easily.

To give azaleas the excellent drainage they require, they should be planted high, with half the root ball above the existing ground level in a hole at least twice as wide as the root ball. Amend the planting soil to provide good nutrition for these hungry plants. Once the plant is set in the planting hole, fill in around it with the planting mix, packing firmly to eliminate air pockets. Mound soil up to top of root ball. Water shrubs thoroughly with a diluted plant starter fertilizer to encourage root growth and help them establish more quickly. Mulch 2-3 inches deep over the planting hole, with mulch pulled away from plant stem to avoid insect infestations and rotting.

Watering Azaleas

Spring and summer plantings should be watered 2-3 times per week until fall the year they are planted, then once a week until Christmas. Plants may need to be watered as often as once a day if they are small or the weather is hot. Always check the soil moisture level before watering. It should be lightly moist several inches down, but if it is drying out more frequent watering may be needed. In following years you will need to water your azaleas about once a week unless there is a good soaking rain. Plants will need more water in hot summers and while in flower to keep their growth and form lush.

The Need for Mulch

Mulching around azaleas is always a good idea, and can help them thrive. A 2-4″ layer of mulch should be maintained at all times over the root area of the plant, but pulled away from the stems. This keeps the soil cool and moist, helps control weeds and protects roots in winter.

Pruning Azaleas

Azaleas rarely need to be pruned. When pruning is required it should be done immediately after blooming, since if you wait to prune until summer you may cut off next year’s blooms and miss an entire flowering season. Azaleas may be sheared, as they will send out new shoots anywhere on a branch, or you may choose hand-pruning to create a neater form.

With a bit of considerate care, azaleas can be a showstopper in your landscape. Stop by today for help choosing the best azaleas and learning all you need to know to keep them gorgeous year after year!

azaleas

Aphids

One of the most common insects, and one of the most potentially plant-threatening, is the aphid. There are actually many types of aphids – more than 4,000 in all. Some feed on specific plants and others are not so choosy. They all attack the newer plant growth and suck sap from a plant’s internal circulation system, the phloem, in stems and leaves. This can decrease the plant’s growth rate, discolor or disfigure leaves, cause galls to form and transmit plant diseases. Strong aphid infestations can lower produce yields and eventually kill plants altogether.

Recognizing Aphids

Aphids – also called plant lice, blackflies and greenflies – are easy to recognize. They’re about one-eighth to one-third of an inch long, usually pale green but can be almost colorless, pink, black or brown. Their pear-shaped bodies have six legs, small tail-like structures and long, jointed antennae. Aphids are soft-bodied and are mainly found in dense groups on the underside of new plant growth, where they leave behind a sticky residue called honeydew. Ants are attracted to aphid honeydew, so a nearby ant infestation or very active ant colonies may also indicate that aphids are present. Aphids are most common in spring, and die off rapidly in the hot temperatures of summer.

Controlling Aphids

Fortunately, controlling aphids is fairly easy. Most full-spectrum chemical insecticides kill aphids. Other, less strenuous products include plant extracts, neem oil, plant oils and insecticidal soap water sprays. A regular spraying with strong blasts of water or hand picking will control many infestations, especially when just a few aphids have been noticed. Many gardeners release ladybugs (lady beetles) to eat the aphids or parasitic wasps to lay their eggs in the aphid, but because these natural predators will quickly spread out, large applications of hundreds of predators may be needed to effectively control an aphid infestation. Another option is to encourage insect-eating birds to visit the yard – chickadees, titmice and warblers all especially love aphids and can provide superior natural pest control. Even hummingbirds will happily munch on aphids.

It’s best to control aphids early. As their numbers increase, the drying leaves begin to roll over them, thus protecting the aphids from controls such as soaps, oil and water sprays, and making it harder to effectively eliminate these pests. If you think you have aphids or you’re not sure what you have, bring in a sample. We’ll take a look and suggest the best way to eliminate the problem and help you protect your plants.

aphids_3

aphids_1

aphids_2

Growing Veggies in Containers

Do you dream of a delicious, homegrown harvest but don’t have the land to use? No longer should a shortage of garden space prevent you from growing your own fresh vegetables. As long as you have a sunny location you can have your own mini-farm on your porch, patio, deck, balcony, roof-top or doorstep!

Why Use Containers?

The benefits of growing containerized vegetables go beyond the issue of space. There are plenty of other compelling reasons to plant your veggies in pots, including…

  1. Vegetables are amazingly ornamental and can be just as decorative as any other container plants or flowers.
  2. There are fewer problems with pests such as groundhogs, deer and rabbits and soil borne diseases.
  3. The soil in pots warms up more quickly in the spring allowing for earlier planting and an extended growing season.
  4. Less bending, squatting and kneeling is required for gardeners with limited mobility.

Vegetables can be grown in any vessel that can hold soil, has adequate drainage and is large enough to hold a plant. There are endless options available on the market or you may recycle items that you already have as long as they meet these requirements. Use your imagination – try a wheelbarrow, wine barrel or just a plastic bin, and you’re ready to plant!

Best Vegetables for Containers

While all veggies can be grown in containers, some are better suited than others. Plants that grow particularly large, that sprawl or that must be grown in large numbers to ensure an adequate yield may take more effort and careful site planning with an adequate container. Similarly, vining plants need not be avoided. Trellis these plants up against a wall or fence or allow them to cascade down from a taller pot or a container placed up high like on a stone wall. For smaller selections, a hanging basket or window box may be used. Many sprawling and vining vegetables are now available by seed in dwarf, compact or bush varieties. These are bred specifically for small spaces and containers and are worth seeking out.

Tips for Container Vegetable Gardens

Growing vegetables in containers does take some unique thought and isn’t quite the same as planting in a traditional garden. When planning your delicious container garden, consider…

  • Containers: Size matters when planting in containers. The bigger the container, the more soil it can hold. More soil more and more moisture means less watering. Take note that porous containers like terra cotta dry out more quickly and will therefore require more frequent watering.
  • Soil: When planting, choose a good quality potting mix. Soil from the ground may contain insects or disease or may be too heavy. Add an all-purpose balanced fertilizer at time of planting. It is also good idea to mix water absorbing polymers into the soil. These granules can hold up to 400 times their weight in water and help reduce watering from 30-50 percent.
  • Plants: Some of the vegetables that you select may be directly seeded into your container; these would include peas, beans, radishes and corn. With most vegetables you may wish to transplant seedlings into your container, either home-grown or garden center purchased. You will generally find a wider selection of vegetable varieties and unique options available in seed as opposed to purchased seedlings, if you want to use your containers experimentally.
  • Supports: Supports should be placed at time of planting for large or vining plants. This will ensure the young plants are not disturbed or damaged with supports added at a later time. If the supports are outside the container, however, they can be added only when they are needed.
  • Location: Your vegetables will require at least 6 hours of direct sun a day. If this is not possible you may try placing your pots on dollies or carts and moving them to a sunnier location as the sun moves throughout the day. Note that good air circulation is important for disease control.
  • Watering: Test soil frequently for water to make sure that you keep it evenly moist. Water the soil, not the plants, to avoid the spread of disease. Check soil moisture more frequently during the summer months when evaporation is faster. Mulching your containers with salt hay or grass clippings will help keep soil cool during the summer months and reduce the frequency of watering. If possible, a drip system can be a great option for keeping containers watered.
  • Fertilization: Fertilizer leaches through pots quickly. Fertilize containerized vegetables at least once a week with a water soluble fertilizer. Always be careful to follow the directions on the fertilizer package and follow the recommended rate. Too much fertilizer may burn or kill your plants, but too little will result in undernourished, underperforming plants.

With appropriate care that caters to the needs of containers, your small-scale vegetable garden can be just as lush and productive as any larger, more intensive space, and you’ll soon have a bountiful harvest to enjoy.

Tremendous Turf

The benefits of turf grass as a ground cover are numerous and often undeclared or overlooked. In recent years, turf has gotten a bad reputation due to the belief that a beautiful lawn requires a lot of hard work and overuse of dangerous chemicals. This is a misconception and the benefits of turf can far outweigh the concerns, particularly when you care for your turf properly and responsibly.

The following is a list of the many advantages that our lawns provide. This list was provided by and may be found, along with other helpful turf information, at www.TheLawnInstitute.org.

Environmental Benefits

  • Cools the Air
  • Produces Oxygen
  • Filters Air & Reduces Pollution
  • Captures & Suppresses Dust
  • Recharges & Filters Groundwater Supply
  • Reduces Storm Water Runoff
  • Controls Soil Erosion
  • Retains and Sequesters Carbon
  • Assists Decomposition of Pollutants
  • Restores Soil Quality

Community & Human Health Benefits

  • Enhances Community Pride & Social Harmony
  • Offers a Natural Playing Surface for Recreation
  • Provides a Safe Surface & Reduces Injuries
  • Promotes Outdoor Activity & Exercise
  • Improves Physical & Mental Health
  • Relieves Stress
  • Lowers Allergy-Related Problems
  • Dissipates Heat & Cools the Environment
  • Reduces Glare
  • Diminishes Noise Pollution
  • Minimizes Nuisance Pests
  • Compliments Overall Landscaping
  • Preserves Natural Wildlife Habitat

Economic Benefits

  • Increases Property Values
  • Reduces Home Cooling Costs
  • Provides a Low-Cost Ground Cover
  • Serves as a Fire Barrier
  • Improves Visibility & Deters Crime
  • Boosts Human Productivity

With so many benefits to healthy, luxurious turf, won’t you give your lawn another chance? We can help – from suggestions for revitalizing a weak lawn to proper mowing tips to fighting weeds and pests, plus all the tools, seed, fertilizers and amendments you need to improve your lawn – our experts can help you make the most of every square inch of your turf!

Keeping Cats Out of the Garden

Do you love cats but don’t love them in your garden? Outdoor cats will seek out a nice patch of soil to do their business or to roll around and play. Cats will mark their territories on sheds, fences or plants, and may even raise a new litter under a deck or in an open shed. Fortunately, there are a number of safe yet effective ways to keep our furry friends, or those of our neighbors, from messing up the garden.

Discouraging Cats

Whether the cats visiting your garden are prowling pets, lost strays or wild-bred feral cats, the same techniques can be used to make your garden and landscape less cat-friendly. Popular options include…

  • Commercial Repellents
    There are a many effective odor and taste repellents on the market. Seek out a product that is safe for humans and animals made from botanical oils. You will need to reapply this type of repellent after a heavy rain but usage will decrease once the cat is retrained to go elsewhere.
  • Citrus Smells
    Cats don’t like the sharp, tangy smell of citrus. Instead of composting them, throw the peels of oranges, lemons, limes and grapefruit on the ground where cats tend to visit.
  • Heavily Scented Plants
    Some plants are known to repel cats by their scent, particularly plants with strong odors that will irritate sensitive feline noses. Try planting Coleus canina, otherwise known as scaredy cat plant, along with pennyroyal, rue, lemon-thyme, geranium or lavender throughout the yard and garden.
  • Uncomfortable Ground
    Use stones instead of mulch as a ground cover to prevent cats from digging. Sharper, larger stones are best and will be uncomfortable for cats to walk across or lay on as well. You can also lay chicken wire on top of the mulch to make it less comfortable for cats and to prevent digging.
  • Opt for Thorns
    Plant low growing, thorny plants such as carpet roses, barberry or prickly pear at the base of your bird feeder to protect your feathered friends from predatory cats. Use thorny plants in borders or alongside fences to help keep cats away as well. Even plants with sharp, stiff foliage, such as holly, can be effective.
  • Sprinklers
    Install a motion-activated sprinkler. This method is used to frighten cats away, not to soak them. As the cat is retrained to go elsewhere its use eventually becomes unnecessary.
  • Sound Deterrents
    Install an ultrasound device containing a motion sensor which, when triggered, gives off a high-pitched sound that is imperceptible to humans but bothersome to cats. With their sensitive ears, cats may avoid any area where the sound is strongest.
  • Remove Food
    Be sure there are no food sources for outdoor cats in your yard. Do not feed your own pets outside, and keep trash cans tightly covered or inside a garage where cats cannot reach them. Keep compost piles behind a fence and under a mesh cover as well so cats cannot forage for scraps.

Using several techniques simultaneously will have the best effect at discouraging cats. These are clever, intelligent creatures that can easily overcome one obstacle, but when you have used several tactics at once, the cats will take the easier route of simply staying away.

What You Should Never Do

While there are many ways to keep cats out of your yard, you should never take steps that could deliberately injure or kill the animals. Avoid harmful traps, toxic poisons or setting your dogs on outdoor cats, as these methods can easily backfire and hurt local wildlife instead. With patience and perseverance, it is possible to keep cats out of your garden safely.

Pruning Evergreens

When choosing an evergreen for your landscape project, it is always best to select a plant that will not outgrow its designated space, crowding out nearby plants or distorting its own shape without enough room to shine. Proper research can help you choose – you should know the ultimate height, width and growth rate of your selection before committing to what may be one of the more costly additions to your landscape. Always choose naturally slow-growing or dwarf conifers for small spaces, bearing in mind how nearby plants and structures may limit available space over time. Fortunately, just about every genus of evergreen is available in a dwarf variety.

That being said, what if the mistake has already been made? We’ve all made it! It is easy to fall in love with a sweet little plant in the garden center that, within a few years in the ground, looks like it could swallow your house. Fear not, there are ways to rectify the situation with proper pruning.

You will need the right tools to accomplish the job:

  • Loppers
  • Bypass pruners
  • Safety goggles
  • Leather gloves

Pruning should begin in the early spring before the plant’s soft new growth hardens off. Take a close look at your evergreen to determine its branching habit. Pine, spruce and fir trees all have layers of branches that are whorled around the trunk. Arborvitae, juniper, yew and false cypress have limbs that are produced randomly along the trunk.

Conifers with a random branching habit are able to grow new limbs from old, foliage-bearing wood. You may prune this type of evergreen back to this older wood to encourage a more compactly branched habit and keep size down, or to create the desired shape. Whorled branching evergreens are pruned differently, however. They have new growth called “candles” at the tip of their branches, and they really do look like candles with lighter coloration. To promote a more densely branched, compact habit, pinch the candles back by up to half their length before the needles harden off. Never cut into the older wood below the candle, as this type of evergreen does not have dormant buds on the stem that will become new growth. Pruning into old wood will leave a hole in your plant and distort its overall appearance.

As always, we are eager to assist you with selecting the proper plant for any landscape project you undertake and to advise you on proper pruning to keep it healthy and beautiful for many years.

prune2Pine with Cones natural backgroundprune1

Sweet Peas, the “Queen of Annuals”

For many gardeners, it’s not the tulip or daffodil to forward to at the end of winter, it’s the sweet pea (Lathyrus odoratus) that declares, “spring is here!” The colors and sweet fragrance of these climbers announce the coming of warmer days like no other.

Choosing Sweet Peas

The hardest part of growing sweet peas is choosing from the riot of colors. From the palest of pastels to the most vivid of hues (including stripes), reds, pinks, white, blues, purples, yellows… the list seems endless. Many gardeners buy mixed packages of seeds to avoid the decision and to add a riot of spring color to the garden and landscape.

Beyond color, it is important to carefully consider different types of sweet peas. If the seed package says “tendril” this means the plants have small green growths to attach to a surface or netting to help the vine grow upright. This is how the taller sweet pea vines support themselves as they grow to 6′ (or even taller!), and they will need an appropriate trellis, arbor, arch or other structure to reach their full beauty. The varieties with no tendrils remain more compact, making them great in containers. Some of these will trail downward, creating a beautiful draping effect. Other dwarf non-vining varieties act as annual fillers in the mixed garden bed or as borders.

Growing Sweet Peas

These beauties are super easy to grow. To improve the germination rate, especially of the darker colors, use nail clippers to gently nick the seed coat and soak overnight before planting. This will allow thin shoots to pierce through the thick seed covering more easily so they can grow effectively. Sow the seeds 2″ deep in rich, well-draining soil in a full to partial sun location. If the soil is heavy, add compost to improve the texture and nutrition. Keep the soil moist, but avoid saturated soil that can drown small seeds or delicate roots. Germination should occur within 10-28 days. Continue even and consistent watering. When seedlings are 4-5″ tall, thin them to create 5-6″ spacing between plants. To encourage bushy and compact plants, pinch the tips when three sets of leaves form. Generally, do not provide additional fertilizer, otherwise the plants may be lush but the flowers will be sparse.

Impatient gardeners or those who may have a shorter growing season may also be able to purchase seedlings from a garden center. This way there will be fragrant sweet pea bouquets a month earlier, and there’s no need to miss out on the sweetness if the ideal seed planting date has passed. Removing flowers when transplanting will encourage stronger root growth to produce larger flowers later if desired.

Seeds for perennial sweet peas are also available. Unlike annual sweet peas, the perennial plant will continue to bloom throughout warm, humid summers. Be aware, however, that annual sweet peas tend to have a gloriously heady scent, but this is a feature sorely lacking in the perennial form.

Enjoy the Beauty

Those long-lasting, colorful and fragrant flowers are so sweet in large loose arrangements. They’ll easily last a week if the water is changed daily and a bit of the stem is snipped off each time to improve water uptake. Remember, the best way to extend the sweet pea blooming season is by daily picking early in the day. Or, simply enjoy these beautiful blooms by walking through the garden each day and relaxing in their delicious scent and colorful blooms.

Fall Flowers – Really!

Gardeners who just can’t get enough of annual sweet peas don’t have to mourn their loss in spring. Instead, grow them again in the autumn! These fast-growing flowers will thrive just as well in the cool autumn as they did in the early days of spring. Just remember to provide enough time for flowering before the first frost hits, and you’ll love using sweet peas to say goodbye to the gardening season in fall just as you said hello to them in spring.

sweatpea_1_250x250
sweetpea_4_250x250sweatpea_2_250x250Lathyrus in little vases