Yearly Archives: 2017

Edible Flowers

Flowers aren’t just for beautiful dining table centerpieces anymore! For all you “foodies” out there, who also love flowers, are you aware that there are numerous blooms that are not only edible but also delicious? Flowers make a striking, colorful, textural and flavorful addition to soups, salads, baked goods and more.

Safety First

There are just a couple of things to keep in mind when experimenting with unfamiliar flowers. Not all flowers are edible and some can be poisonous, even in small tastes. Be certain to clearly identify your flowers and accept no imposters, as some blooms can look very similar. Also, it is best to use flowers that have not been sprayed with chemicals – either fertilizers or pesticides. The best way to avoid both of these issues is to grow your own edible flowers from seed, keeping them conveniently in a kitchen container garden or safely on a deck or patio where there’s no risk of contamination or misidentification.

Favorite Edible Flowers

There are surprising blooms that can be tasty accents to your favorite dishes. For the best flavor and freshness, harvest blooms at their peak early in the day. Younger and older blooms or blooms of different sizes often have subtly different flavors, so be sure to experiment to find your favorites.

  • Bee Balm (Monarda didyma) – Tea-like flavor, flowers in white, pink, red and lavender
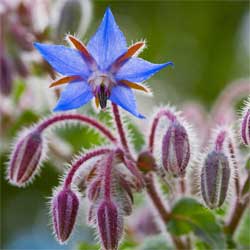
  • Borage (Borago officinalis) – Cucumber-like taste, flowers in lavender, purple and blue
  • Calendula (Calendula officianalis) – Peppery taste, flowers in yellow, orange and gold
  • Chive (Allium schoenoprasum) – Onion flavor, flowers in white, pink and lavender
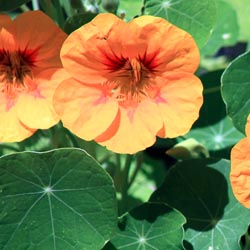
  • Nasturtium (Tropaloum majus) – Peppery flavor, flowers in white, yellow, orange and red
  • Pineapple Sage (Salvia eleagans) – Sage flavor with pineapple undertones, flowers in scarlet
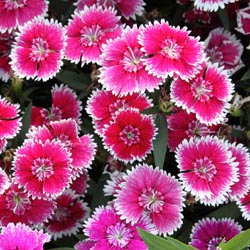
  • Pinks (Dianthus spp.) – Clove-like flavor, flowers in white, pink and red
  • Red Clover (Trifolium pretense) – Sweet tasting, flowers in pink and red
  • Signet Marigold (Tagetes tenufolia) – Citrus taste, flowers in white, yellow, gold and red
  • Viola or Pansy (Viola spp.) – Sweet flavor, flowers in a multitude of colors

Not sure which recipes to try? Flowers make surprising accents to salads or garnishes for cakes, cookies and ice creams. Add flower petals to a favorite drink, or freeze blooms in ice cubes for colorful cooling. There are even recipes available for sauces, salsas, marinades and more, all with more taste and color thanks to edible flowers. Bon appétit!

EdibleFlowers_4EdibleFlowers_1EdibleFlowers_2

Caution in the Garden… Chlorosis

Yellow means caution, even for plants. While leaf yellowing, known as chlorosis, may be a signal that there is a problem that requires attention, it may also be normal. Understanding when this coloration is to be expected and when it indicates a problem is essential to be sure you’re giving your plants the proper care.

The Good and the Bad About Chlorosis

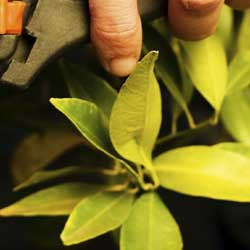
Chlorosis is the scientific word used to indicate the full or partial yellowing of plant leaves or stems and simply means that chlorophyll is breaking down. There are times when this is normal, expected coloration, and there are times when it indicates deeper problems that need attention.

  • Normal Chlorosis – Yellowing leaves at the base of an otherwise healthy plant is normal; the plant is simply utilizing the nitrogen and magnesium for exposed leaves near its top rather than older, lower leaves. These yellowed, older leaves will eventually shrivel and fall off as newer growth emerges at the top of the plant.
  • Chlorotic Response to Light – Moving a plant from full sun to shade, or visa-versa, can cause yellowing leaves as the plant reacts to the change and stress. Make sure that you grow and maintain your plant in the proper light. Also bear in mind seasonal changes that may affect how much light a plant is exposed to, even if it hasn’t been moved.
  • Chlorotic Response to Moisture – Sudden changes in soil moisture may damage or kill plant roots which can lead to yellowed leaves as the roots are unable to take up sufficient moisture. Most otherwise healthy plants, however, are able to grow new roots as they readjust. Maintain correct soil moisture or move the plants to a more favorable environment.
  • Mineral Deficiency – A shortage of some key mineral nutrients will cause chlorosis in plants. Often, a yellow leaf indicates a lack of nitrogen, however, magnesium, iron, sulfur or manganese deficiencies are indicated by yellowing leaves with prominent green veins. A magnesium deficiency will manifest itself in the yellowing of older leaves. On the other hand, an iron deficiency presents itself in the yellowing of new or young leaves. A simple soil analysis will let you know what minerals or trace elements your soil is deficient in.
  • Soil Factors – Although essential and trace elements may be present in the soil, many other factors affect how the plant uses and absorbs them. If the soil pH is too high/low or there is too much salt in the soil, the plant will not be able to utilize the available nutrients. Test your soil pH and adjust as necessary to be sure the plant can absorb nutrients appropriately to maintain proper foliage colors.
  • Toxins – Although this doesn’t happen frequently, pollutants like paint, oil, chemical solvents, airborne herbicides or pesticides or other pollutants may cause leaves to turn yellow and dark brown before dying. In this case, remove and dispose of the plant and its surrounding soil, and mark the area to be sure it can be treated appropriately and no other plants are inadvertently exposed to the toxins.

It can be alarming to see healthy plants suddenly yellowing, but by understanding chlorosis and how it happens, you can take steps to determine the cause of the color change and what to do to help your plants recover.

bug_1

Planting Basics – Trees & Shrubs

Are you ready to add trees and shrubs to your landscape? You don’t need to hire professionals to do the planting when you learn the basics of doing it the right way yourself.

Soil Preparation

How quickly and how well trees become established once they are planted is affected by the amount of stress they are exposed to before and during planting. Minimizing planting stress is the goal of proper planting. Trees and shrubs should also be thoroughly watered prior to planting to minimize water stress.

Ideally, soil preparation should be carried out well ahead of planting. Preparation could include incorporating organic matter into the soil to improve aeration, assist drainage of compacted soils and improve soil nutrient-holding capacity. Specific preparation may be needed if the soil has an inappropriate pH or is lacking in certain elements. Trees and shrubs with a limited soil tolerance range may require very specific soil preparation to meet their requirements.

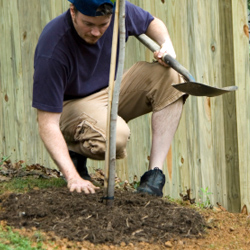
Additional soil preparation is essential when you are ready to plant trees and shrubs. Dig the planting hole 50 percent wider but only as deep as the root ball. Prepare soil by mixing one-third existing soil, one-third organic matter and one-third topsoil.

Planting Container-Grown Trees & Shrubs

When you buy a plant from a garden center or nursery, it often comes in a small pot that holds the roots. Remove the plant from that container gently, but without pulling on delicate stems or foliage. Squeezing the container all around can help loosen the root ball so it slides out more easily, or the container may be thin enough to cut away.

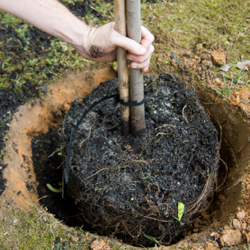
Because the plant was grown in a container, its roots have been restricted by the shape of the container. Loosen the roots all the way around, even on the bottom. If the root system is too tight to loosen with your fingers, cut through roots slightly with a knife or pruning sheers. Make three or four one-inch deep cuts, then gently pull the roots apart.

Center the plant in the prepared hole, keeping it 1-3 inches above grade. Keep roots spread out.

Planting Field-Grown Trees & Shrubs

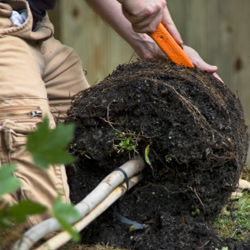
If you are transplanting a tree or shrub that has been field grown, it may have bare roots or be lightly bagged or burlapped. Center the plant in the prepared hole 1-3 inches above the grade. Cut and remove all cords or twine from the root ball and trunk. Burlap should be left on, but loosened and pulled away from the trunk and below the soil surface. Remember to move trees carefully. Roll the root ball on its side and “steer” it into the hole with the trunk. Straighten the tree upright in the hole, checking it from different angles to be sure it is fully upright.

Completing the Planting

For both container-grown and balled and burlapped plant material, backfill the planting hole with soil your mix and pack firmly. Make a rim of soil around the plant to act as a “saucer” for holding water.

Water thoroughly with a slow soaking, and use a root stimulator fertilizer to provide good initial stimulus for the roots to spread out.

Apply a 2-inch layer of mulch around your new planting, keeping an open space of 3 inches around the trunk or base of the plant to allow for air circulation.

Staking Container & Field Grown Trees and Shrubs

When larger trees or shrubs are planted, they are not yet firmly established in their new locations and may tip or lean as the soil settles. For larger trees, use three wires secured to anchor stakes in firm ground (never into the root ball). Where the wires touch the tree, they should be covered with rubber hose to prevent damage. Remove stakes as soon as roots become established. This can be as soon as a few months, so check your tree frequently. Stakes should not be left in place any longer than one growing season.

New Plant Care

All newly planted trees and shrubs need gentle care as they settle in to their new locations. To keep them healthy and encourage good initial growth…

  • Water Properly
    Plants should be slowly soaked to a depth of 4 inches, which is the equivalent of about an inch of water per week. This is necessary during the first year or two. Let the hose run slowly at the base of the plant until the water has penetrated to the root depth. Too much water can also be a problem. Feel the soil. If it is soggy or squishy, do not add water. Frequent light watering is not as good as a thorough soaking once per week, which will encourage strong root growth.
  • Fertilize Appropriately
    Your new plants should be given a Root Stimulator type fertilizer right after planting. You should not use a fertilizer meant for mature plants on new material, as it could cause damage to your plant. It is essential for new plants to develop a healthy root system – top growth will follow. After the first season, regular fertilizers can be used.
  • Prune Safely
    Pruning at planting time may be necessary for larger trees to reduce leaf surface to match cut roots. Remove one-third of smaller twigs. Do not cut back the main trunk or larger branches. If shaping is necessary, trim side branches enough to get uniformity.
  • Be Alert for Insects and Diseases
    Keep an eye out for holes or brown leaves or needles. This could be a sign of insect or disease problems. Ask our staff for help identifying the insect or disease and to prescribe appropriate treatments.
  • Special Care Plants
    Some plants need extra special care because of their finicky needs. For example, azaleas, hollies, rhododendrons and dogwoods all need well-drained, acidic soils, high in organic matter and a shady location. Research the trees and shrubs you are planting to be sure you are meeting their needs right from the beginning.

It can seem intimidating to plant your own trees and shrubs, since they are an investment in your landscape that you hope to enjoy for many years. By understanding planting basics, however, you can easily give every plant a great start in its new home.
Time to PlantTime to Plant

Time to Plant

Time to Plant

Jump Start Your Pond

Are you ready to get your pond started up for another beautiful spring and summer? It can be a big job to rejuvenate such a large water feature so it remains balanced and healthy after a long, harsh winter, but with a few careful steps, your pond can be back in shape in no time.

When to Reopen Your Pond

It is important that you don’t try to get your pond started too early in the season. All risk of hard freezes should be long past, and even nightly frosts should be tapering off or already finished before you restart your pond. The exact time will vary based on your pond’s size, depth and location, as well as your ambient weather conditions and the pond’s overall ecology. For example, a smaller, shallower pond in a sunny area will be warmed up and ready to restart before a larger, deeper pond in a shady spot. It can be helpful to keep a journal or calendar from year to year to note when you reopened your pond and how successful your efforts were. In time, you’ll be able to adjust your calendar easily without risking the health and wellness of your pond, even if annual conditions change.

Easy Steps to Restart Your Pond

When you are ready to jump start your pond…

  • Remove the netting that was set in place last fall. If needed, clean and make repairs to the netting right away so it will be ready to use next fall. Store it safely where it will be easy to reach when needed again.
  • Remove excess sediment from the bottom of the pond with a vacuum or a net. It is not necessary to remove every bit of sediment, but most of the debris should be removed so the pump can function effectively.
  • Test last year’s pump and replace if necessary. Be sure to test any additional moving or electrical features, such as waterfalls, fountains or lighting around the pond so repairs can be made if needed.
  • If water level is low, add fresh water to desired height. Avoid overfilling the pond, however, which can disrupt the essential chemical and microbial balance that keeps the pond healthy.
  • Add de-chlorinator as necessary to remove heavy chemicals from the water that has been freshly added to the pond. As with any chemical treatments, be sure to test the water several times to be sure you reach the proper balance.
  • Place aquatic plants in the pond and begin fertilizing to meet their nutritional needs. These may be plants that you’ve overwintered in a safe location, or you may choose to add new or exotic plants in late spring.
  • Begin feeding fish when water temperature stays above 55 degrees. Keep feedings minimal at first as fish come out of dormancy, as excess food will only rot and lead to greater bacteria and algae growth in the water.

It is perfectly natural for your pond water to turn green at first, but with the proper plants it should balance itself out in no time. It may take a few days or even a couple of weeks for your pond to return to its healthy, active state, but if you’re restarted it properly, you shouldn’t have any major problems.

pond

Top Native Shrubs for Year-Round Interest

We just love incorporating natives into the home landscape, and it’s easier to do than many gardeners realize. Including native plants is an important part of sustaining local pollinators and wildlife. Furthermore, native plants are naturally lower maintenance and pest-resistant, and wow, are they beautiful!

Favorite Native Shrubs

It’s easy to find native shrubs to provide interest in the garden the whole year through, from fresh spring growth to brilliant summer blooms to outrageous autumn foliage to stunning winter structure. Our list offers outstanding selections that will do well in a variety of moisture levels, soil types and sun exposures. Cultivars of these species offer variations in size, form, leaf color and shape as well as flower colors.

  • Sweet Pepperbush (Clethra alnifolia)
    Deciduous shrub, 3-8 feet high x 4-6 feet wide. Fragrant white blooms in July to August. Full sun to part shade, but will tolerate heavy shade. Moist to wet soil, tolerates erosion and clay soil. Use as a hedge, to naturalize or in rain garden. Attracts butterflies.
  • Sweetfern (Comptonia peregrina)
    Deciduous shrub, 2-5 feet high x 4-8 feet wide. Insignificant flower, ornamental and fragrant leaf. Full sun to part shade. Medium moist soil preferred, but also drought tolerant. Use to naturalize or in rain gardens.
  • Silky Dogwood (Cornus amomum)
    Deciduous shrub, 6-12 feet high x 6-12 feet wide. Yellowish-white flowers in May to June followed by showy fruit. Full sun to part shade. Medium to wet soil. Deer tolerant. Good for erosion control. Use as a hedge or in a rain garden. Attracts birds.
  • Winterberry (Ilex verticillata)
    Deciduous shrub, 3-12 feet high x 3-12 feet wide. Showy red fruit in the winter. Full sun to part shade. Medium to wet soil and tolerates clay soil. Tolerates air pollution. Controls erosion. Use as a hedge or in a rain garden. Attracts birds.
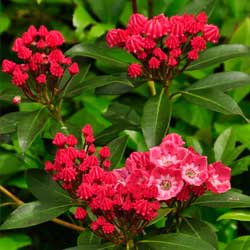
  • Mountain Laurel (Kalmia latifolia)
    Broadleaf evergreen, 5-15 feet high x 5-15 feet wide. May-blooming with rose to white flowers with purple markings. Sun to part shade. Medium moist soil. Deer and rabbit tolerant.
  • Spicebush (Lindera benzoin)
    Deciduous shrub, 6-12 feet high x 6-12 feet wide. Fragrant greenish-yellow, flowers and showy fruit. Part shade but can tolerate heavy shade. Medium soil moisture and drought tolerant. Deer tolerant. Can grow in clay soil. Attracts birds and butterflies.
  • Northern Bayberry (Myrica pensylvanica)
    Deciduous shrub, 5-10 feet high x 5-10 feet wide. Showy fruit in the winter. Full sun to part shade. Dry to medium soil moisture. Use as a hedge, naturalize or in a rain garden. Attracts birds.
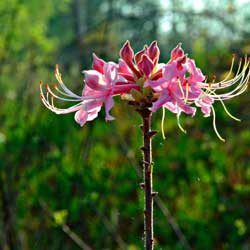
  • Pinxterbloom Azalea (Rhododendron viscosum)
    Deciduous shrub, 3-5 feet high x 3-5 feet wide. Blooms white to pale pink in May to July. Part shade. Medium to wet soil moisture. Very ornamental and good as a cut flower. Tolerant of rabbits. Attracts hummingbirds and butterflies.
  • American Cranberry Bush (Viburnum opulus ‘americanum’)
    Deciduous shrub, 8-12 feet high x 8-12 feet wide. White lacecap flowers in April to May. Edible fruit. Full sun to part shade. Medium soil moisture. Use as a hedge or in the shrub border. Attracts birds and butterflies.

If none of these suggestions quite meet your preferences for a year-round native shrub, stop in to see our experts for more tips and options – new species and cultivars are always arriving!

top-native-3top-native-1

top-native-2

Ladybug or Lady Beetle?

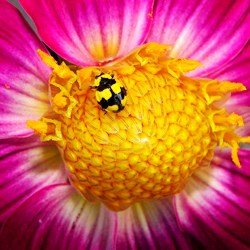
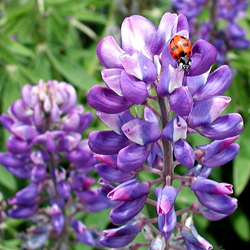
The different names given to ladybugs are almost as numerous as the number of species. But bug or beetle, understanding more about these garden guests can help you better appreciate their diversity and all the help they can offer in your garden and landscape.

What’s In a Name

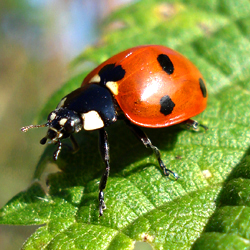
You may call them ladybugs (although they are not really bugs), lady beetles (they are technically beetles), lady birds or in Germany you would say “Marienkafer” (Mary’s beetles). In North America, there are more than 350 distinct species of ladybugs, and there are more than 4,000 ladybug species around the world. Most species can be identified by the pattern of spots on their elytra (flight wing covers). In many areas, these helpful insects go by different common names, including lady fly, lady cow, little hen, insect of fortune, Mary’s bug and more.

About These Bugs

Lady beetles are members of the beetle family Coccinellidae, which means “little sphere.” In their life cycle, a lady beetle will go through egg, larval, pupal and adult stages, though the length of each stage and how quickly the beetle proceeds through each one will vary depending on the species and local conditions. Lady beetles may live in shrubs, fields, trees and logs.

Lady beetles’ favorite food is the notorious aphid, though they do eat a variety of different insects. A female lady bug has huge appetite, eating from 75-100 aphids per day, while the male eats about 40 per day. This makes them ideal garden helpers, and many gardeners deliberately release swarms of lady beetles to help control aphid outbreaks. Most lady beetles are predators, but a few are plant eaters, and can be crop pests if not controlled appropriately. Crops most at risk from certain lady beetle species include potatoes, beans and different types of grain. When lady beetles swarm in vineyards and are inadvertently pressed with wine processing (it inevitable that some insects are part of the process), they can impact the taste of the resulting wine.

Self-Preservation

Lady beetles have some surprisingly innovative ways of protecting themselves. First of all is their coloring. Most predators know that bright colorings mean that their victim would likely taste gross, usually sharp or very bitter, and bold colors can even indicate poisons or stinging. While lady beetles don’t sting, their bold red and black coloration can easily mislead predators. Lady beetles also produce a pungent odor when threatened or may just play dead. As well, the lady beetle larvae is kind of alligator looking, so not many predators will not mess with it.

Ladybugs and lady beetles are fascinating insects, well known to gardeners throughout the world. The more you know, the more you’ll respect and appreciate these iconic insects.

ladybug_article3ladybug_article2ladybug_article1

Pink Muhley Grass

Ornamental grasses are becoming increasingly popular, and there is now an over-abundance of options available at garden centers. So many choices can make the selection process difficult, even overwhelming. There is one ornamental grass, however, that takes the cake. Pink Muhley Grass is arguably the most colorful ornamental grass around and it is sure wow your friends and neighbors.

About Pink Muhley Grass

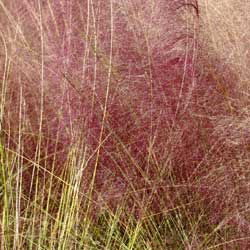
Pink Muhley Grass (Muhlenbergia capillaris) is a native grass that is deer, drought and salt tolerant. It is hardy in zones 7-10 and may be grown as an annual elsewhere. Broadly adaptable, this grass prefers sun but will tolerate part shade and will grow well in just about any soil type. ‘Regal Mist’, or also called ‘Lenca’, is a cultivar known for the deepest plume color.

Perfect used as a specimen plant in containers or in groupings in beds and borders as well as naturalized in a meadow garden, this fall bloomer is an outstanding ornamental plant. The pink-purple flower plumes that grow up to 4 feet are also exceptional for use in cut and dried floral arranging.

Proper Care

This ornamental grass is very easy to care for. Simply prune your Pink Muhley Grass clump back hard in late winter or very early spring before the attractive new growth begins to show. Although drought tolerant, the plant will be fuller and lusher with regular, consistent watering. It is especially adaptable to poorly drained soils, and can grow in full sun or partial shade locations.

In the Garden and Landscape

There are many stunning uses for this outstanding grass, whether you are cultivating a formal garden or a more relaxed landscape. Consider these popular options…

  • When not flowering, the green clump creates a textured mound acting as a groundcover or background for other smaller plants. It can also soften harsh garden corners, walkway edges or awkward intersections.
  • As a finely textured grass, plant Pink Muhley Grass with contrasting companions such as calla lilies, evergreen shrubs or low growing groundcovers to create interest in the landscape.
  • Plant in front of the larger smoketree Cotinus coggygria ‘Grace’ for an exquisite coordinating display of color and texture.
  • Plant where it will be backlit. It positively glows where it catches the early morning or late afternoon sun.
  • Use as a beautiful and unusual addition to floral arrangements.

Do you need another reason to grow Pink Muhley Grass? Oh, yes, the birds will thank you – they love the seeds!

pink-muhley-1

Begonias for the Home

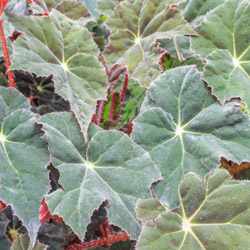
Begonias are a beautiful and diverse group of plants, with more than 1,500 species. Some are suitable for use as bedding plants or in container gardens, some for hanging baskets and others for indoor cultivation. Begonias are treasured not only for their colorful flowers but also for their unique foliage, and many varieties make spectacular houseplants. 

Indoor Begonia Care 

Begonias require little care when grown indoors. They need plenty of bright light with shading from the intense afternoon sun. Comfortable indoor temperatures are advisable, 65-75 degrees Fahrenheit, and should drop slightly at night, but not below 55 degrees Fahrenheit. Begonias are very sensitive to over watering. Make certain that the soil drains well, the pot has a drainage hole and water is not permitted to stand in the saucer. It is beneficial to provide additional humidity as heating and air conditioning rob indoor air of precious moisture. The best way to increase humidity is to use a humidity tray under your begonias. Avoid misting these plants to prevent mildew on leaves. Provide adequate air circulation to ensure the foliage stays fresh without excessive dampness. 

Indoor begonias are relatively carefree if they are kept healthy. Insects that commonly affect indoor plants may also cause problems for begonias. These include mealybug, whitefly and spider mites. If leaves become crispy around the edges it is an indication that the plant requires more humidity. If the leaves yellow and start to fall off it means the plant is receiving too much water. Fertilize begonias bi-weekly with a balanced fertilizer during the growing season. Stop fertilizing during the winter months to give the plant a rest.

 If you have any questions about these or any other houseplant problems, please call or stop by our greenhouse and speak with one of our experts. 

Best Begonias for Indoor Cultivation 

  • Angel Wing Begonias
    These begonias are favored for their large, colorful, patterned, wing-shaped leaves. The flowers of this begonia are large, hang in clusters and tend to be soft in color. Angel Wings bloom in shades of white, pink, red and orange. Due to their cascading habit, these plants lend themselves well to hanging baskets but also look wonderful in larger pots. You may pinch Angel Wing Begonias to keep them at a manageable size and also to promote new canes at the base of the plant. Hang these plants outside in a semi-shaded area during the summer.
  • Rex Begonias
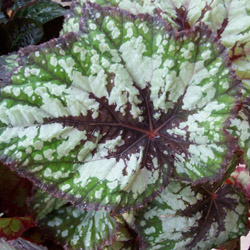
    Although these begonias do flower, rex begonias are grown primarily for their striking foliage. The leaves are uniquely shaped, unusually patterned, heavily textured and come in exceptional color combinations that can include green, pink, red, silver, yellow, orange, maroon and purple.
  • Rieger Begonias
    These are one of the most loved and easy to care for houseplants. The main attraction of this plant is the brilliantly colored, double or semi-double flowers in white, yellow, orange, pink and red. This plant will flower for several months and the flowers will last longer if temperatures are on the cooler side, 55-65 degrees Fahrenheit. Deadhead to encourage new blooms and extend the blooming season.
begonia-2

Rex Begonia

begonia-3

Raising Root Crops

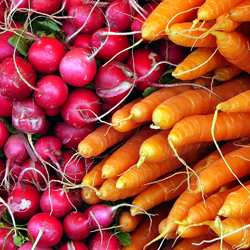
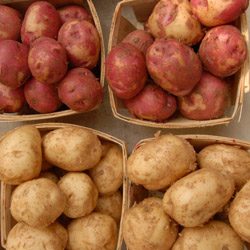
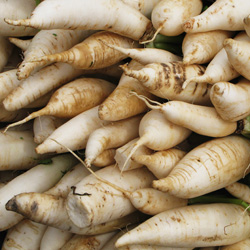
Root crops are among the easiest vegetables to grow, and often the first and last vegetables in the garden to mature. Your garden may produce enough vegetables to take you through the entire year and, if kept correctly, root crops will last a long time in storage. These vegetables are great to grow, even in a small space. Many root crops are frost tolerant and with most, the tops, or greens, are also edible. 

What Root Crops Need 

To get the best harvest of root crops, no matter which types you opt to add to your garden, you need to meet their cultivation needs. 

  • Soil
    Root crops grow best in deep, loose, rock-free soil that will allow the roots to form and grow easily. To nourish the plants, supplement the soil with plenty of organic matter.
  • Fertilization
    Root crops require a high phosphorus fertilizer for optimum growth, but check the needs of individual crop types to choose the best mixture. Always apply fertilizer according to the proper directions to prevent burning.
  • Temperature
    Most root crops are considered cool season vegetables and are planted both early and late in the growing season. Warm days and cool nights are most beneficial for root expansion.
  • Light
    Full sun is best.
  • Planting
    Seeds should be sown 2-3 weeks before the last expected frost date and subsequent plantings made every three weeks thereafter as weather permits (some exceptions apply). Planting depth varies depending on the type of plant; follow the directions on the seed packet. After seedlings emerge, thin to desired spacing as determined by the diameter of the root at harvest time. Beet and turnip tops that are thinned are edible raw as salad greens or they may be cooked. Root crops are generally not transplantable because they have a tap root.
  • Mulch
    Mulch plants that have already been thinned with salt marsh hay to retain soil moisture and minimize weed growth.
  • Pest Control
    Maintaining appropriate cultivation requirements will reduce or eliminate the need for pest control. As with all vegetables, it is important to rotate crops each year. Rotating root crops will discourage root weevils.
  • Basic Storage
    All root crops may be stored for a time before being eaten. In general, store at 32 degrees Fahrenheit and 95 percent humidity. Leave the crops in the garden as long as weather permits, then dig. Store the harvest in a root cellar or refrigerator.

Tips for Favorite Root Vegetables 

  • Carrots – Plant in sandy soil if you want the classic, long, narrow type.
  • Beets – You may harvest 1/3 of the tops without affecting the root.
  • Garlic – Best planted in the fall.
  • Horseradish – Use caution when planting this aggressive perennial.
  • Kohlrabi – Has a mild, sweet cabbage flavor.
  • Leeks – Flavor is best if harvested after a light frost.
  • Onions & Shallots – Plant from seed or sets.
  • Potatoes – Best planted from ‘seed potatoes’ to match variety.
  • Radishes – Mature in as little as three weeks.
  • Sweet Potatoes – Warm weather root crop, will not withstand a frost.
  • Turnips – For a fall crop, sow seeds in midsummer.
raising-root-1

raising-root-2

raising-root-3

Attracting Hummingbirds

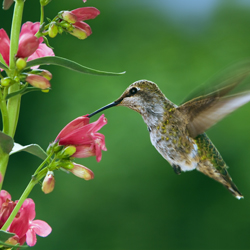
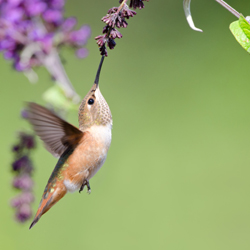
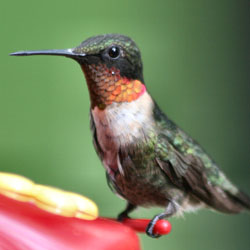
It is an awesome sight to capture a glimpse of a ruby-throated hummingbird hovering over the flower garden on a sunny summer morning. One or two a year may be seen seeking food in the landscape, sampling everything in their path. Unfortunately, they leave as rapidly as they arrive. This season, attract more of these miniature avian anomalies and keep them returning year after year. 

What Hummingbirds Want 

You can charm hummingbirds to your yard with a selection of their favorite nectar-producing flowers. Hummingbirds are not attracted by scent but by color. Red happens to be their favorite, however, pink, purple, blue, orange and yellow will also catch their eye. Tubular flowers accommodate these birds’ long, narrow bills. Select a wide variety of plants that bloom at different times to keep hummers well fed all season long. Refrain from using insecticides when attracting hummingbirds, as they rely on insects for protein in their diets – especially during the summer nesting season when young hummers need extra protein for healthy growth. 

Hanging a feeder is another way to encourage these visitors. Choose one with red parts to resemble the flowers that they prefer. Fill the feeder with a mixture of one part sugar to four parts hot water to help the sugar dissolve. Fill the feeders after the mixture has cooled. Easier yet, fill with instant nectar purchased at our store. Clean feeders every 2-3 days early and late in the season, and daily in hot weather. 

Plants That Attract Hummingbirds 

The easiest way to keep hummingbirds fed without the hassle of refilling and cleaning feeders is to provide a lush landscape filled with their favorite flowers. Fortunately, that’s easy to do because these birds will sample nectar from a wide variety of blooms. No matter what your yard size, soil type, sun exposure or moisture levels, there are plants you can add to the landscape to entice hungry hummers to stop for a snack. 

Annuals

  • Flowering Tobacco
  • Four-O-Clocks
  • Fuchsia
  • Geraniums
  • Impatiens
  • Mealy Blue Sage
  • Mexican Bush Sage
  • Nasturtium
  • Petunia
  • Pineapple Sage
  • Red Salvia
  • Zinnia

Bulbs

  • Canna
  • Gladiolus

Perennials & Biennials

  • Bugleweed
  • Bee Balm
  • Beard Tongue
  • Cardinal Flower
  • Columbine
  • Coral Bells
  • Daylily
  • Delphinium
  • Gaura
  • Hollyhocks
  • Hosta
  • Phlox
  • Spiked Gayfeather
  • Lily
  • Rose Mallow
  • Russell Hybrid Lupine

Vines

  • Cypress Vine
  • Honeysuckle
  • Morning Glory
  • Scarlet Runner Bean
  • Trumpet Vine

Shrubs

  • Azalea
  • Butterfly Bush
  • Glossy Abelia
  • Lilac
  • Weigelax

Trees

  • Bottlebrush Buckeye
  • Catalpa

Fun Hummingbird Facts 

Why not learn a little more about these fascinating birds? The more you know about their amazing abilities and unique characteristics, the more you’ll appreciate having them visit your yard! 

  •  Hummingbirds are the smallest birds in the world.
  • There are over 340 species of hummingbirds and they are found only in the western hemisphere. Most species are found in the tropics.
  • Hummers can hover as well as fly straight up and down, sideways, backwards and even upside down.
  • Hummingbirds beat their wings about 75 times per second.
  • They can drink eight times their body weight and consume about 500 insects daily.
hummingbird2

hummingbird3

hummingbird1