Yearly Archives: 2017

Rose – Queen of the Garden

We all love roses. It may be the luxurious fragrances, rich colors or the elegant flower forms that attract us. It may be the memories that roses evoke. Whatever the reason, roses are one of the world’s most popular flowers. With so many different types of roses available, ranging from the diminutive miniatures to the towering climbers, there is no excuse to exclude this “Queen of Flowers” from your garden.

Rose Types

There are many types of roses to cultivate, and it can be difficult to choose. If you’re just getting started with roses, consider some of these popular favorites…

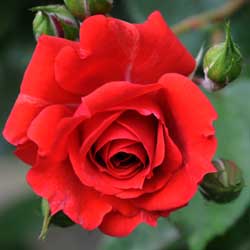
  • Hybrid Tea Roses: These blooms are a favorite of rose gardeners who enjoy long-stemmed, large flowers. Hybrid tea flowers have many petals and plants grow upright and tall, about 3-7 feet. These roses are appropriate in either a formal garden or informal planting.
  • Floribunda Roses: These roses have smaller flowers than hybrid teas with the flowers arranged in clusters. This rose bush is useful as a hedge for a border or privacy screen, and is equally stunning in mass plantings.
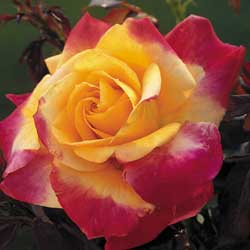
  • Grandiflora Roses: These beauties were developed by crossing hybrid teas with floribundas. This rose grows to around 10 feet tall so it should be used in the back of the border where its beauty won’t shroud other plants. The flowers of the Grandiflora are hybrid tea form and can be single stemmed or borne in clusters depending on the cultivar.
  • Climbing Roses: These roses make an outstanding vertical display when trained on arbors, walls, fences, trellises and pergolas and can grow from 8-15 feet tall. Flowers may be borne large and single or small and arranged in clusters.
  • Miniature Roses: These delicate nymphs are dwarf in every way – flowers, leaves and height. This rose may be mass planted as a ground cover, used as border or grown in containers on decks, patios and porches.
  • Shrub Roses: These flowers are renowned for their bushy habit and superior disease resistance making them an excellent choice for mass planting. The shrub rose flower may be either single or double. Some types have very showy rose hips.
  • Old Roses: These luscious heirlooms are making a come-back! Although bloom times and color choices are limited, old roses are much more fragrant, vigorous and disease resistant than modern roses. To obtain all the qualities of an old rose combined with a long bloom time of a modern rose, look for the David Austin varieties.

Not sure which rose is just right for your landscape or garden? Our rose experts will be glad to help you choose the perfect rose no matter what thoughts or emotions you want your garden to evoke. Stop in today to see the latest types of roses and the most popular cultivars for this year’s gardening.

roses_3

roses_8

roses_1

Watering Tomato Plants

Proper watering plays a significant role in producing a healthy tomato plant with tasty, meaty, juicy fruit. So, what’s the secret, and how can you be sure you are watering your tomatoes the right way?

Watering Location

Always water tomatoes at the root zone; never overhead water your tomato plant. Watering directly at the soil level will strengthen the plant’s root system and ensure the maximum amount of moisture reaches the roots. When you overhead water, much of the water will not make it to the roots as it evaporates before reaching the soil. Water droplets on plant leaves act as a magnifying glass and can burn tender plant tissue, damaging foliage that is essential to keep the plant healthy. Water dripping from leaf to leaf can also spread disease, infecting an entire crop. To be sure tomatoes are not being watered inappropriately, keep plants out of reach of lawn sprinkler systems or other inadvertent watering.

Watering Speed

Slow watering is essential to properly distribute moisture to a tomato plant. Allow the water to drip slowly into the soil, giving the plant roots time to absorb the moisture. A drip system is best and will also help with water conservation. Avoid using a hand held hose, as it is easy to either underwater or overwater using this method. Water to a depth of 8 inches to ensure all roots have access to adequate moisture. You can also use a watering reservoir, such as a gallon jug with several small holes in its bottom, to slowly and carefully water the plants without flooding the root zone.

Watering Frequency

A regular watering schedule is essential for the healthiest, most productive tomato plants. Water consistently to produce larger fruits and to avoid split and cracked fruit and blossom end rot. Tomato plants should be watered 2-3 times a week in the height of summer or when natural rain is lacking. A deep soaking rain counts and supplemental watering should be adjusted whenever Mother Nature lends a hand with watering chores. The top inch or two of soil should dry out between watering to be sure the plant is not getting too much moisture.

Watering Adjustments

There are several times when it may be necessary to adjust where, when and how much you water your tomatoes. Changes in local rainfall – increasing spring or summer rains, a sudden storm, an unexpected drought – can require changes in supplemental watering to keep the moisture to your tomatoes consistent. As plants grow and more fruit appears, more water may be needed to meet the plant’s watering needs and keep it lush and healthy.

By understanding the basics of watering tomatoes, you can keep your plants well hydrated without risk of either overwatering or underwatering, both of which could be disastrous for your tomato crop.

WaterTomato

Determinate Versus Indeterminate Tomatoes

It’s tomato-planting time again! If you’ve grown tomatoes in the past, you most likely have your favorites. If not, just ask! You’ll find some pretty strong opinions regarding tomato choices, and every gardener has their own top choices, must haves and great picks for tomatoes.

Choosing Tomatoes

Along with soil type, climate, moisture and other typical gardening considerations, one of the features you will need to take into account when choosing what type of tomato to grow is plant habit. The two main habit classifications are “determinate” and “indeterminate” and are based on fruit use, available growing space and length of growing season. Both habit classifications include fruit selections in a wide variety of colors, sizes, shapes and tastes.

Determinate Tomatoes

Tomatoes from a determinate plant are produced earlier in the growing season, on terminal ends of a compact bush. This type of tomato generally reaches 3-4 feet in height and is easily supported with a tomato cage or may even be self-supporting. Due to its compact habit, it may even be grown in containers, ideal for gardeners with less available space. Because all the fruit ripens at the same time, determinate tomatoes are an excellent choice if you plan to can your fruit or make sauce, as you won’t need to worry about collecting enough fruit to work with. Determinate classification includes popular tomato varieties such as:

  • “Celebrity” – an eating tomato
  • “Roma” – a paste tomato
  • “Patio” – a dwarf selection
  • “Baby Cakes” – a cherry tomato
  • “Carolina Gold” – extra large, yellow fruit

Indeterminate Tomatoes

Indeterminate tomato plants will fruit along the entire length of the stem over a longer period of time, in fact continually, until frost. Smaller amounts of fruit ripening regularly throughout the growing season makes an indeterminate tomato plant an excellent choice if you cannot cook or consume a large quantity of this perishable fruit all at one time. Indeterminate tomato plants are vines, requiring proper pruning and support, to reach their ultimate height of 8 feet or more. Indeterminate classification includes popular varieties like:

  • “Amish Paste” – heirloom, paste tomato
  • “Beefmaster” – extra large sandwich tomato
  • “Better Boy” – juicy but firm, compact vine with shorter internodes
  • “Black Krim” – deep color, rich flavor
  • “Chocolate Cherry” – cherry, chocolate red in color

By understanding the differences between these basic tomato classifications, it will be easy for you to choose the tastiest tomato to suit your gardening needs and harvest preferences. Many gardeners choose more than one of each type of tomato, ensuring there is always a bountiful supply to use, to share and to enjoy!

Tomatoes

Try Something New: Pomegranates

Want to grow an exotic fruit that is delicious, nutritious, beautiful and incredibly hip? You really should consider planting a pomegranate! It’s not as difficult as you may think.

Why Pomegranates are Popular

Pomegranate is a stunning superfood rich in antioxidants, folic acid and vitamins A, C and E. It has no cholesterol, and is also rich in fiber and potassium. Because of these nutritional advantages, pomegranate is showing up in a multitude of supermarket products like yogurts, juices, salad dressings, jellies and desserts. It can be added to sauces, fruit crisps, salsas, relishes, dips and more. You can even make a pomegranate martini! And, of course, it’s an extraordinary experience eating a fresh pomegranate. These are stunning, delicious fruits that are rarely seen in backyard gardens, but can make a great landscaping statement when properly grown.

Growing Pomegranates in the Landscape

Pomegranates grow as multi-stemmed, small trees or large shrubs. They reach 15 feet tall by up to 15 feet wide. In spring, vibrant, gorgeous orange-red flowers grace the branches of this plant. These beautiful blossoms develop into the luscious pomegranate fruit containing dozens of tart and tangy bright red seeds and pulp. The fruit ripens somewhat square in the early fall and has a leathery skin that can be yellow to red in color.

The cultivar ‘Wonderful’ is hardy to zone 7 and is easy to grow. Plant your tree in full sun. It will thrive in the summer heat and in most soils. Pomegranates are drought tolerant, however, the fruit is better and the seeds more plump with regular deep irrigation. Because this fruit tree is self-fertile, there is no need to plant a second one for pollination.

Enjoying Your Pomegranates

If you’ve never cut your own pomegranate, it can be frustrating to learn how to separate the juicy seeds from the husk and membrane. To access the seeds…

  1. Cut off the crown of the fruit.
  2. Score the leathery husk in quarters from stem to crown end.
  3. Set the scored fruit in a bowl of cool water and let soak for a few minutes.
  4. Hold the fruit under water and break scored sections apart with your fingers, separating the seeds from membrane. The seeds will sink to the bottom of the bowl.
  5. Discard the skin and membrane.
  6. Drain the seeds on paper towels.
  7. Toss pomegranate seeds into your salad, mix them in your yogurt or smoothie or shake them into a martini and enjoy!
pomegranate-1pomegranate-2pomegranate-3

How To Succeed At Seed-Starting

It’s easy to buy seedlings, but there are many reasons why you may wish to start your own plants. By starting your own seeds, you have a much greater selection of flowers, vegetables and herbs to choose from. For example, old favorites like hollyhocks and less common varieties of herbs and perennials as well as heirloom vegetables might not be available as plants, or stocks may be limited. Plants with fine seeds should also be started indoors because they can easily wash away in the rain and they may have a difficult time competing with weeds. Starting your own seeds can also help you extend the growing season so you can enjoy a longer, more productive harvest. So why not get started today?

Containers for Starting Seeds

Traditionally, seeds are started in flats or peat pots. There are various sizes of plastic trays, cedar flats, peat pots and the popular Jiffy-7, a flat, peat-moss wafer, available. When moistened, the Jiffy-7 expands to form a small, self-contained pot of soil into which a seed is sown directly. This is an excellent choice when sowing seed of plants that do not like their roots disturbed during transplanting. You might also use eggshells or folded newspaper pots to start your seeds.

Seed-Friendly Soil

It is best to use a light, soilless mix when starting seeds. These mixes are sterile, meaning young seeds do not have any weed seeds to compete with, and there are no harmful bacteria, insects or other pests in the soil right away. Good seed mixes also contain adequate nutrients to carry seedlings through until transplanting. Do not use garden soil, as seeds will not germinate well in the heavy soil, and a fungus disease called damping off is common.

Temperatures for Seeds

Most seeds require warm soil in order to germinate. You will need to heat the soil of the seedling flats with a heat mat, heat tray or heating cable. Seed trays can also be placed on top the refrigerator or hot water heater. Do not put seed-starting trays on a windowsill; nighttime temperatures are too cool to allow for good germination. Seeds need consistent warm temperatures of 75 degrees or warmer for optimum germination.

Seed Watering Needs

Seeds need to be kept constantly moist in order to germinate. Moisten the soil thoroughly before planting. Water when the surface is dry with a misting nozzle or plastic spray bottle until the soil is saturated. The medium should be constantly moist, but not soggy. It is important not to overwater, which could drown the seeds and tender seedlings, but also not to permit the flat to dry out.

Sowing Seeds

Seeds should be sown 2-10 weeks before the last spring frost date. Your seed packet will provide this information as sowing dates can vary for different plant varieties or even cultivars of the same plants. Fill your containers almost to the top with moist growing mix. Tamp it down gently and smooth it out. Gently press the seeds into the mix or simply set them on the surface of the soil and place milled sphagnum moss over the top to prevent damping off. Cover the container loosely with plastic wrap or a clear dome, which will help preserve moisture and warmth. Be sure to label your containers with plastic or wood plant stakes and write the plant name and the date sowed. Set trays in a warm spot and check daily to keep evenly moist.

Seedling Care

Once seedlings have grown a half-inch or so, you should water less frequently. Let the soil dry slightly between watering, which will help the seedlings stretch and develop a strong root system. Seedlings will also need light and the best method is to use the traditional fluorescent fixtures or the new energy-saving LEDs. Suspend lights just an inch or two away from the plants. Lights must be on at least 14-16 hours a day. As your seedlings grow, raise the lights accordingly so they do not bump into the lighting fixture. If your seedlings do not get enough light, they will become weak and spindly. Fertilize seedlings weekly with half-strength, balanced, organic fertilizer. A fish and seaweed blend works well. Thin seedlings if they become overcrowded, choosing the healthiest, strongest seedlings to save.

Hardening Off and Planting Out

When the weather is warm, move your seed trays outside gradually over a 5-7 day period. Start by putting them out just for a few hours during the late morning to mid-afternoon, and then gradually increase until they are left out all day and night. Keep them in a lightly shaded, protected spot during the day to prevent sunburn. After a week or two of this transition, gently transplant seedlings into the garden. Try not to handle the root ball too much, as they are quite fragile. Water thoroughly after transplanting and again every day for about a week. Newly set out plants will look sparse at first, but they will grow and fill in quickly, leading to bumper crops and a lush, delicious harvest!

Gardener With Seedling Tray

Seedling Box Tray in Greenhouse

seed_starting_3

Acid-Loving Plants

Soil pH is a critical factor for gardening success. Some plants thrive in neutral soil while other plants prefer soil on the acidic side. The difference lies in the plant’s ability to use nutrients present in the soil. For plants that prefer an acidic soil a critical nutrient is iron. Iron is most easily available in soil with a pH of around 5.5. Without iron, acid-loving plants will turn yellow and suffer stunted growth.

What is pH?

pH stands for “potential hydrogen ions” and is the measure of acidity or alkalinity. The pH scale ranges from 0 to 14. pH less than 7 indicates acidity, pH greater than 7 indicates alkalinity and 7 is neutral. Soil pH directly affects nutrient availability. Plants grown in soil with pH above or below their optimum range will be less vigorous, more susceptible to disease, less able to fight off insects and may even be weakened to the point of death.

How pH Affects Plants

Nutrients necessary for healthy plants are divided into three categories: primary nutrients, secondary nutrients and micronutrients. Primary nutrients are (N) nitrogen, (P) phosphorus and (K) potassium. These nutrients requited in the largest amounts for plant growth and health and are represented in numbers found on every fertilizer container (for example, 20-20-20). (Ca) Calcium, (Mg) magnesium and (S) sulfur are secondary nutrients that are also required by plants. These are required in lesser amounts than N-P-K but are also essential for good plant growth. (Zn) zinc and (Mn) manganese are examples of micronutrients. Micronutrients are required by plants in very small amounts. Most secondary and micronutrient deficiencies are easily corrected by keeping the soil at the optimum pH value.

Because pH directly affects nutrient availability, acid-loving plants develop iron chlorosis when grown in soils that are too alkaline. Iron chlorosis is often misdiagnosed as a nitrogen deficiency because both present with a yellowing leaf. Chlorosis of young leaves is the first symptom of iron deficiency, while a magnesium deficiency results in yellowing of older leaves first. Nitrogen-deficient plants will not only have yellow leaves but also weak stems, underdeveloped leaves and reduced root development.

What Causes Soil Acidity

Soil pH is influenced by the kind of parent material from which the soil was formed. Rainfall also affects pH. As water passes through soil it leaches basic nutrients such as calcium and magnesium from the soil, which are replaced with acidic elements such as aluminum and iron. For this reason, soils formed under high rainfall conditions are more acidic than those formed under dry conditions. Caused by pollution, acid rain also has an influence in soil pH. The application of fertilizers containing ammonium or urea speed up the rate at which acidity develops in the soil. The decomposition of organic matter will also add to soil acidity.

Testing and Adjusting Soil pH

Before planting any plant it is best to know the optimum pH range that plant will thrive in and the pH of the soil in which you will be planting. “The right plant in the right place” is always the best policy. Purchase a pH test kit or meter. These are available at most garden centers, or you may also send a soil sample to your county extension service. This will give you a more in-depth soil analysis along with the pH. To correct soil pH it is imperative that you know the soil pH before you attempt to change it.

Adding shredded pine needles, composted oak leaves or peat moss will assist in lowering soil pH over time. A quicker fix is the addition of two materials commonly used for this purpose: aluminum sulfate or garden sulfur. Aluminum sulfate will change the soil pH instantly because the aluminum produces the acidity as soon as it dissolves in the soil. Garden sulfur requires some time for the conversion to sulfuric acid with the aid of soil bacteria. The conversion rate is based on the fineness of the sulfur, the amount of soil moisture, soil temperature and the presence of bacteria. Based on these factors, the conversion rate of sulfur may be very slow and could take several months for a full effect. Acidifiers should be worked into the soil after application to be effective. Do not apply to leaf surface or burn may result. Read and abide by manufacturer instructions when applying.

Keep in mind that it takes time to alter soil pH and your soil will tend to revert to its old pH over time, necessitating repeated treatment. Attempting to change soil pH too quickly may shock and kill a plant. A good rule of thumb is to adjust no more than one point per season. It is also important to note that fertilizers recommended for acid-loving plants do not assist in adjusting the soil pH, but are instead formulated to work well in already acidic soil.

Acid-Loving Trees and Shrubs

Want to add gorgeous plants to your landscape without worrying about acidic soil? These plants thrive in soils with low pH, or come in for an expert consultation on your soil’s pH and what plants will do best in your garden, flowerbeds and landscape.

  • Azalea
  • Bayberry
  • Blueberry
  • Camelia
  • Cranberry
  • Dogwood
  • Fir
  • Fothergilla
  • Gardenia
  • Heath
  • Heather
  • Hemlock
  • Holly
  • Hydrangea
  • Itea
  • Leucothoe
  • Magnolia
  • Mountain Ash
  • Mountain Laurel
  • Oak
  • Pieris
  • Pine
  • Raspberry
  • Rhododendron
  • Spruce
  • White Cedar
acidlovingplant3

acidlovingplant

acidlovingplant2

Endless Summer® Hydrangeas

Do you love the look of large, stunning hydrangeas? Do they evoke wistful images of summer and floral nostalgia? Don’t you wish they would last longer in the landscape? Unfortunately, many hydrangeas have relatively short bloom cycles, but there are amazing cultivars you can investigate that provide longer lasting blooms without losing any of their beauty or richness as the season progresses.

Endless Blooms, Color and Summer Luxury

Endless Summer® The Original and Endless Summer® and Blushing Bride® are the first mophead (large, ball-shaped flower) hydrangeas that bloom on both old and new growth, providing you with beautiful flowers and gorgeous color all season long. Young plants produce blooms that are 4-6 inches wide, while mature plants can have blooms as large as 8-10 inches wide, making these massive hydrangeas real show stoppers in your landscape or garden. Flower color for Endless Summer® The Original ranges from shades of blue through shades of pink, depending upon the pH level of your soil. Pink blossoms are the result of alkaline soils (pH 6-7), while more acidic soils (pH 5-5.8) will cause the plant to produce blue flowers. Adding Master Nursery Hydra Blue or other acidifying agents to the soil can help produce the lovely blue colors if your soil is initially alkaline, or you can adjust bloom color throughout the season for a vibrantly changing show. Endless Summer® Blushing Bride, as its name implies, initially offers pure white blossoms that mature to a sweet, pink blush or pale blue tinge, again depending on the soil pH.

Large, deep green leaves provide a lovely background for these spectacular flowers, which are excellent for cutting for fresh arrangements and for drying. Endless Summer® hydrangeas mature at 3-5 feet in height and width and are perfect used as standalone specimens, planted in borders or as hedges, massed under deep-rooted trees or even set in large containers. These plants perform best in partial shade with moist soil. Another big plus for Endless Summer® hydrangeas is the fact that they are cold hardy to Zone 4, giving northern gardeners a beautiful plant that will bloom well year after year.

Perfect for Mother’s Day, Father’s Day, weddings and house warming celebrations, potted Endless Summer® hydrangeas make beautiful gifts that will provide years of beauty and enjoyment. If you already have these stunning blooms in your yard, consider cutting a few for a bouquet and share the joy with friends, neighbors, family members, coworkers and acquaintances, and the interest in these amazing hydrangeas will continue to spread until the world is blooming all summer long.

endless-summer-hydrangeas-2

endless-summer-hydrangeas-3

endless-summer-hydrangeas-1

Cool Wave Pansy

Make way for Cool Wave Pansy! New and improved, bigger and brighter, the familiar little monkey-faced pansy is the new garden darling. These flowers are even more versatile and easier than ever, and ideal for so many beautiful landscaping options.

New Pansies

Cool Wave Pansy is a relatively new cultivar that has so much to offer. These flowers are ideal in beds among other plants and shrubs as a colorful vigorous filler, planted en masse as a blooming groundcover or planted to create amazing baskets and container arrangements with 30” of cascading floral beauty. Standing 6-8 inches tall and covered with three times as many blossoms as regular pansies, Cool Wave Pansies have flowers that glow in four new colors.

  • Frost: White with light blue “frost” edging along the petal margins
  • Violet Wing: Front lower petals are white edged with lavender or darker purples, backed with dark burgundy or purple on upper rear petals
  • Yellow: Bright lemony or sunny yellow blooms
  • White: Bright white petals with slight color variations for elegant interest

Growing Tips

Easy to grow, Cool Wave Pansy is much more vigorous than ever. Choose plants with an overall deep green color with plenty of buds for the best results and fastest blooming. Plant in fertile soil where the plant will receive 6 hours of daily sunlight. Use a liquid fertilizer when planting and fertilize every two weeks to maintain vigor and color. Replace with wave petunias in the summer when it becomes too warm for pansies.

Cool Wave Pansy grows well in rain or cold. In fact, it easily overwinters in many areas. This three-season performer may be planted for fall color, overwinter, and then perk up again in early spring providing an early punch of pizzazz. If it becomes too leggy, just cut back the foliage back to 3 inches tall and fertilize. In a couple of weeks, it will be smiling up at you.

When planting in containers, consider the flower and container colors to maximize the visual effect. Interplant with other textures and colors for an eclectic rainbow of vibrance. When planting in fall, add spring blooming bulbs, as they’ll easily grow through the pansies to create a riot of spring color. Spiky grasses provide a tall and contrasting effect to the pansy’s trailing tendrils, especially in larger containers.

With so many stunning options and new colors to embrace, there’s sure to be a Cool Wave Pansy perfect for all your flower planting desires!

pansy_3

pansy_1

Choosing the Right Flowering Tree

Purchasing a tree for your landscape is an investment that can raise the property value of your home and bring you pleasure, beauty and shade for many years to come. Selecting the proper flowering tree for your enjoyment is easy, just follow these simple guidelines and remember, we are here to help you with any of your gardening questions.

  1. Care
    Study your chosen planting environment carefully. Familiarize yourself with the sun patterns. Will your tree be in full sun, part sun or shade? What about soil type? Is it heavy clay or well-drained loam? Some trees will survive in poor soil, some will not. Is there a water source nearby? Having a clear understanding of your tree’s cultural requirements and characteristics of the site you have chosen will help you make a good match so the tree will thrive.
  2. Size & Form
    Consider the space where you will be planting the tree of your choice. Know the ultimate height and width of the plant that you choose to make certain that it will not outgrow the room you have allotted for it. At the same time, note the growth habits and sizes of nearby trees and shrubs to be sure they don’t crowd one another out in the years to come.
  3. Flowers
    Make note of when you would like your tree to flower. For instance, you don’t want flowers in August if that is when you are traditionally away on vacation. Many flowering trees are available in more than one flower color, depending on the cultivar. Choose the one that works best for you and your taste and looks good with whatever else you will have flowering at the same time.
  4. Other Ornamental Characteristics
    A higher value and more enjoyment is gained by choosing a tree with multiple seasons of interest. Look for a flowering tree that may also have interesting winter bark, persistent fruit or unique leaf coloration so you can enjoy its beauty in every season.
  5. Availability
    Frequently, folks will read about a unique new plant introduction and are disappointed when it is not yet available on the market or does not grow well in their area. To avoid disappointment, choose from our large selection of flowering trees in inventory. We pride ourselves on carrying plants that thrive in our area and can suggest an appropriate substitute for your desired tree.

With just a bit of careful consideration, you can easily choose a flowering tree that you will enjoy for many years to come.

FloweringTree_3

FloweringTree_4

FloweringTree_5

Summer Sizzles With Crocosmia

There is an excellent assortment of bulbs available for planting this time of year that promise a bounty of summer blooms. The thing is, many of these bulbs are not winter hardy. This can create a predicament for gardeners anxious for easy summer flowers but short on time and space to dig and store tender bulbs. Crocosmia can be the answer.

Introducing Crocosmia

Native to South Africa, Crocosmia – also known as montbretia, coppertips or falling stars – sizzles all summer long in colors of yellow, orange and red. The numerous small florets are tubular in shape and borne along a long, gracefully arching stem rising above sword-like foliage. Together, this formidable combination creates exotic elegance sure to be a showstopper in the garden or landscape. Hummingbirds and butterflies also find it irresistible when in bloom, and the fall seedpods are delectable for many seed-loving finches and sparrows.

Planting Crocosmia

Plant Crocosmia corms now, while they are available. Plant them in well-drained soil in full sun, 2-3 inches deep and 8-10 inches apart. A south-facing location is best, or in colder regions, add Crocosmia next to a wall that will help warm the soil. The pointy side of the bulb should be facing up. Place a handful of bone meal in the planting hole and water the soil well when done planting. These are drought-tolerant flowers, but supplemental water will still be welcome in extremely dry conditions.

Crocosmia look best when planted en masse. A grouping on either side of a sunny entrance way can be stunning, and they look equally fetching when tucked into the perennial border. This plant performs well in containers and makes an excellent cut flower – in fact, cutting the flowers will encourage even more beautiful blooms to form.

Blooms will first appear in May or June and will continue blooming throughout the summer. Flower spikes can stretch 2-3 feet tall, adding a bold burst of color to the landscape. Even without the flowers, the blade-like foliage is attractive, and some cultivars show pleats or rippling for more textural interest.

After flowers have finished blooming, simply snip off the faded flower stalks. Leave the foliage to fade naturally as you would with any other bulb. These leaves continue to produce food to provide nourishment for next year’s flowers. Leaves may be cut back to the ground once they are completely yellow, and a thick layer of mulch should be added for winter protection. Once established, these bulbs are winter-hardy and will return year after year to heat up the spring and summer with their gorgeous colors and forms.

Crocosmia