Monthly Archives: January 2017

Dividing Hybrid Hellebores

Hybrid hellebores bring us all sorts of happiness. These are one of the first plants to bloom in the late winter and early spring and are available in flower colors of chartreuse, cream, white, pink, red and deep purple. Hybrid hellebores are also those rare and treasured perennials that provide year-round interest, giving you the most bang for your buck and brightening your landscape in every season. As evergreens, they never lose their luster, and their flower shapes and textures are quite varied for even more interest, with a cultivar to suit any gardener’s taste. What’s not to be happy about?

A Love Divided

To keep these plants healthy and thriving, and to increase your quantity, division is a necessity. It is important to divide these plants carefully, however, or else you risk sadness with fewer blooms, lopsided plants or even losing these gems. Fortunately, it’s possible for even a novice hellebore lover to divide their plants with confidence.

  1. Divide hybrid hellebores in the spring when it is in bloom. This will also let you see how the blooms are positioned on the plant so you can divide shapes appropriately.
  2. Choose a plant that has at least 5 flower stems. Each one represents a division and will give you great new plants to bloom.
  3. Dig your hellebores up with a garden spade by inserting it deeply into the soil around the perimeter of the plant about 6 inches away from the outer stems of the clump. This will keep the root system largely intact and uninjured.
  4. Lift the clump and shake off loose soil or any trapped rocks or ensnared mulch. You can gently loosen clumps with your fingers, but take care not to damage the roots.
  5. With a garden hose, wash away any additional soil from the clump so the plant roots are exposed. This will help them get established in their new location more quickly.
  6. Divide the clump by cutting through the roots with a heavy-duty serrated knife. Make your root cuts where you see obvious natural divisions between the flower stalks.
  7. Replant your divisions at their original depth, in a shady location. Include plenty of compost in the planting hole for good nourishment. Water well and continue to keep soil from drying out until your new plants are well established.

Before you know it, you’ll have many more hybrid hellebores to enjoy! If you have a few too many, be sure to share the happiness by giving them to family members, friends, neighbors and anyone else who can fall in love with these beauties.
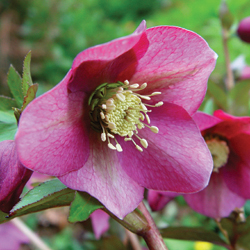
Helleborus orientalis

Peach Leaf Curl

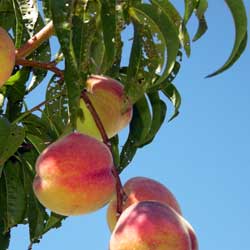
If you grow peaches, you have most likely experienced peach leaf curl. Recognizing the symptoms of this infection and understanding what to do about it can help you keep your peach crop peachy keen.

About Peach Leaf Curl

Peach leaf curl (Taphrina deformas) is a fungal disease that infects the immature leaves of peach and nectarine trees and it is often far worse in years with a cool and rainy spring, conditions that allow this fungus to spread more rapidly. The yearly disease cycle begins at bud swell and continues until the young leaves emerge. The infected leaves turn reddish-brown, pucker, shrivel and fall off the tree. With fewer leaves, the fruit crop is not nourished as well and fruit will be smaller and less productive. On rare occasions, the fruit itself may become infected and will show a scabbed, corky surface in patches.

After the initial infection, the velvety spores are carried by the wind and rain, overwintering in the tree bark to infect the tree again the following spring. Repeated infections will lead to branch die back and eventually shorten the life of the entire tree.

Stopping Peach Leaf Curl

If you are considering growing peaches, choose a leaf curl resistant variety of tree. There are both new resistant varieties as well as resistant heirlooms. If you are already growing peaches, keep your tree healthy with proper and regular pruning that will allow adequate air circulation and sunlight between branches to minimize the damp, cool conditions that help this fungus. Proper feeding and watering of your tree will also help it be more disease-resistant.

If the disease presents itself, apply fungicide every year in the fall after the leaves have dropped. In areas with wet winters, it can be helpful to reapply fungicide in early spring before bud swell. Always rake up and destroy the infected fallen leaves. Safer recommended controls include sulfur and copper-based fungicides. Traditional control products include Daconil and Ferbam, and should be used according to the application instructions. If the infection is localized to just a few branches, it may also be possible to prune away those infected branches in late fall to help minimize the spread of the spores.

Peach leaf curl can be devastating to your peach trees, but if you recognize the disease quickly and take proper steps to minimize its effects, you can keep your trees healthy and protect your crop of sweet, delicious peaches.

peach_leaf

Dealing With Winter Damage

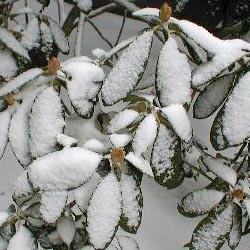
It’s early spring – time to survey the damage that winter has produced. In some areas, shrubs may still be hiding under piles of frozen snow, and could be crushed or compacted. Severed tree limbs may lie scattered across the landscape, and bark may be torn and stripped from trunks. It’s difficult to know what to tackle first, but fortunately, much of the damage is easily correctible.

Repairing Winter-Damaged Trees

When surveying and repairing winter damage, start with your trees – they are generally the most valuable additions to your property. As you survey the damage – broken limbs, torn bark, a tilting trunk – ask yourself “Is this tree salvageable or should it be removed?” If the damage is extensive, or you are unsure about how the damage may affect the tree’s overall health or future growth, hire a professional for a consultation. Replacing a severely damaged tree with a younger one, perhaps a type you like even better, may be the best solution.

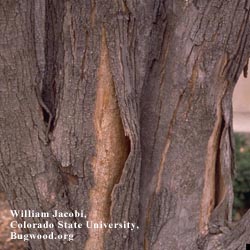
If a limb is broken somewhere along its length, or damaged beyond repair, employ good pruning practices and saw off the remaining piece at the branch collar, being careful not to cut into the trunk or leave a stub. Sometimes a fallen limb may strip bark off the tree trunk. To repair this damage, cut the ragged edges of the loose bark away from the stripped area to firmly affixed healthy bark. Nature will take care of the rest. Even if the trunk of the tree is split, the tree may still be saved. For large trees, repairing this type of damage usually requires cabling and bracing done by a professional. If the tree is still young, the crotch may be pulled tightly together and tied or taped until the wound eventually heals.

Repairing Winter-Damaged Shrubs

Shrubs can suffer the same damage as trees, including broken limbs and stripped bark. Heavy snowfall can crush smaller shrubs, and larger varieties may have their trunks or centers split from heavy snow or ice accumulation. Most shrubs are resilient, however, and slowly regain their shape as the weather warms. If branches are bent but not broken, you may tie them together to help them along and prevent further damage from late-season storms. Do not tie tightly and remove twine after about a year. Completely broken branches may be pruned away, but take care to maintain the shrub’s form and balance, keeping in mind its growth pattern so it will not look lopsided or ungainly. Again, if the damage is severe, you may need to replace the plant.

The harder the winter is, the more of a beating trees and shrubs will take. With prompt attention in early spring, however, you can easily undo much of the damage and help your landscape recover with ease.

damage_1damage_2

Trees For Small Spaces

There’s something about putting a tree in the ground that just feels right. In many cases, you start with just a bare trunk with a few branches and then, rather quickly, it begins sprouting new growth. You nurture your new acquisition and each year it increases in height and girth. Finally, one day, you look out the window and a magnificent mature tree is there to greet you!

Choosing Your Best Tree

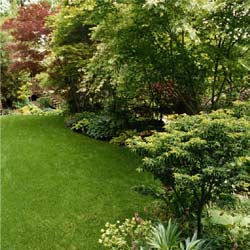
Trees are a permanent addition to the landscape and therefore require a great deal of thought and planning in their selection so you are not regretting your choice as the tree matures. When choosing, not only do you need to keep climate and soil type in mind, but you will also need to consider how much space you have, both above and below the ground, and how large your tree will be at maturity. Large trees should be given the room that they need to grow and thrive. Planted in the wrong location, some large trees have far reaching roots that can damage plumbing, break underground utilities and buckle pavement, not to mention branches that can tower dangerously over your roof. Fortunately, there are many small to medium trees available that look great and cause no damage when planted close to your house, sidewalk or driveway.

Top Trees for Small Spaces

  • Acer ginnala (Amur Maple) – Multi-stemmed, rounded habit, bright red fall color, 15-20’ h x 15-20’ w
  • Acer griseum (Paperbark Maple) – Upright, irregular habit, exfoliating bark, excellent red fall color, 20-30’ h x 15-25’ w
  • Acer palmatum (Japanese Maple) – Numerous varieties, textures, colors and forms and sizes for every taste and situation
  • Aesculus pavia (Red Buckeye) – Native to the southeastern United States, red upright flowers in May to early June, flowers attract hummingbirds, 10-20’ h x 10-20’ w
  • Amelanchier canadensis (Shadblow Serviceberry) – North American native, shrubby, multi-stemmed trunk tree, white flowers in early spring, edible purplish-black fruit, reddish-orange fall color, 6-15’ h x 15-20’ w
  • Betula pendula ‘Youngii’ (Young’s Weeping Birch) – Strong weeping tendency, attractive white bark, yellow fall color, 8-12’ h x 10’ w
  • Carpinus caroliniana (American Hornbeam) – Eastern North American native, multi-stemmed, smooth muscular gray bark, yellow/red/orange fall color, 20-30’ h x 20-30’ w
  • Cercis Canadensis (Eastern Redbud) – Eastern North American native, often multi-stemmed, purple-pink flowers in early spring, 20-30’ h x 20-30’ w
  • Chionanthus viriginicus (Fringe Tree) – North American native, multi-stemmed, rounded habit, fringe-like white flowers in May to early June, golden-yellow fall color, 12-20’ h x 12-20’ w
  • Cornus alternifolia (Pagoda Dogwood) – Eastern North American native, tiered horizontal branching, white flowers late May to early June, blue-black fruit, persistent coral colored fruit stalks, yellow/reddish/purple fall color, 25’ h x 25’ w
  • Cornus florida (Flowering Dogwood) – Eastern North American and northern Mexican native, rounded habit, white or pink flowers in mid-May, reddish-purple fall color, 30’ h x 30’ w
  • Cornus kousa (Korean Dogwood) – Rounded habit, vase-shaped branching habit, flowers white aging to pink in early summer, red to purple fall color, 30’ h x 30’ w
  • Cornus mas (Cornelian Cherry Dogwood) – Multi-stemmed, rounded habit, small yellow flowers in early spring, bright red berries in the summer eaten quickly by birds, 20’ h x 20’ w
  • Crataegus viridis ‘Winter King’ (Winter King Hawthorn) – United States native, broad horizontal crown, white flowers in spring, yellow fall color, abundance of small red berries in winter, 15’ h x 20’ w
  • Halesia tetraptera (Carolina Silverbell) – native, irregular to rounded and broad shaped, pendulous white bell-shaped flowers in May, Smooth muscle-like bark, 30 – 40’h x 25 – 35’w
  • Magnolia stellata (Star Magnolia) – Multi-stemmed tree with oval habit, lightly fragrant showy white blooms in early spring, ornamental smooth silver-gray bark, 15-20’ h x 10-15’ w
  • Malus sargentii (Sargent crabapple) – Mounded habit, blooms April through early May, fragrant flowers, pink-red in bud opening to white, very showy deep red fruit held in clusters, 6-8’ h x 9-12’ w
  • Prunus cerasifera ‘Thundercloud’ (Thundercloud Plum) – Rounded habit, deep purple foliage all year around, slightly fragrant pink flowers in the spring, 20’ h x 20’ w
  • Stewartia koreana (Korean Stewartia) – Pyramidal or oval in shape, white flowers in June and July, long bloom time, excellent fall color orange/yellow/red/purple, 25’ h x 12’ w
  • Stewartia ovate (Mountain Stewartia) – Slow grower, dense with spreading branches, white flowers in July, orange to red fall color, 10-15’ h x 10-15’ w
  • Stewartia pseudocamellia (Japanese Stewartia) – Slow grower, pyramidal, solitary white camellia-like flowers June to August, excellent fall color yellow/red/purple, beautiful exfoliating camouflage bark exposed in the winter, 40’ h x 20’ w
  • Styrax japonica (Japanese Snowbell) – Horizontal branching, broad flat top at maturity, hanging white flowers from late May into June, good fall color of yellow with a reddish cast, 20-30’ h x 20-30’ w
  • Syringa reticulate (Japanese Tree Lilac) – Stiff spreading branches, fragrant showy white flowers borne in early summer on panicles up to 12″ long and up to 10” wide, 20’ h x 15’ w

Overwhelmed with small tree varieties and not sure which one is best for your yard? Let our experts help you choose the perfect tree to fit your space!

small_tree_1small_tree_2

Nurturing Spring Bulbs

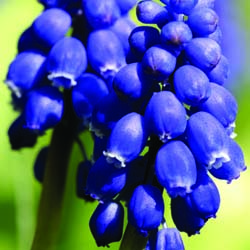
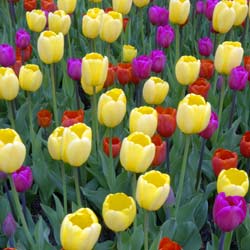
Spring bulbs faithfully reappear at the most advantageous time – after a long, cold winter, just when we’re longing for bright colors to relieve the monotony of winter snow and ice. Most spring bulbs are perennial and multiply in number every year, bringing more beauty to the flowerbeds each spring, but some problems can destroy a carefully planted bulb bed. Seemingly carefree, bulbs do require a bit of nurturing to ensure they perform their very best for years to come.

Tips for Bulb Care

  1. Good soil drainage is important to prevent bulbs from rotting so plan your site accordingly. Do not plant bulbs near areas where downspouts let out or large snow piles may build up and spring melt can drown bulbs.
  2. When planting bulbs in the fall, add a high phosphorus fertilizer to the planting hole for the development of strong roots. This will help the bulbs establish well so they can renew themselves each year.
  3. Bulb foliage will often break through the soil after a few warm winter days. This vegetation is hardy and its exposure to the cold will not damage your plants or prevent them from blooming. There is no need to cover, wrap or otherwise protect this initial foliage.
  4. Fertilize bulbs as plants are emerging from the ground. Do not fertilize once flowers appear. Use a 5-10-5 granular fertilizer to assist in foliage and flower development, ideally one that is formulated especially for bulbs.
  5. After blooming, cut back the flower stalk. This will force the plant to put its energy into the bulb for next year’s flowers and not into seed production that would dampen the strength of the bulb.
  6. Allow the leaves to die back naturally. The leaves are vital for producing food that is stored in the bulb for next year’s growth. Cut leaves, never pull, once they have turned yellow – pulling can damage the bulb. Do not tie leaves as this reduces the leaf surface required for adequate food production.
  7. When the foliage has completely died back the bulb is dormant, and this is the proper time to dig and separate bulbs if necessary. Flowering will often be reduced when bulb beds become over-crowded. If division is needed, bulbs should be dug and stored in a cool, dry, well-ventilated place and replanted in the fall.
  8. Fertilize bulbs again in the fall with a high-phosphorus, granular fertilizer.

With thoughtful care, you can easily help your bulbs reach their full potential and they will thrive for many years.

SONY DSCbulbs_5


Pre-Emergent Control of Crabgrass

Did you have a crabgrass problem last year? Well, chances are, it’s gonna be even worse this year! Crabgrass is an annual lawn weed that dies once a hard frost hits. The main problem with this pest is the tenacious seed that it leaves behind after it blooms.

Early spring is the season to control crabgrass with a pre-emergent herbicide. This chemical works by killing the crabgrass seedlings as they germinate. Here’s what you need to do:

  • Apply the pre-emergent as the forsythia is going out of bloom.
  • For newly seeded lawns, wait until you have mowed your lawn three times before applying the herbicide. This will help to avoid killing the new grass.
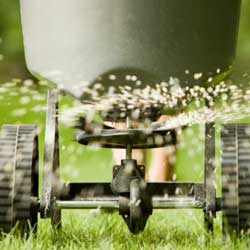
  • Use a spreader to apply the herbicide uniformly across your lawn.
  • Apply your pre-emergent before a light rain. This will knock the chemical off the grass blades and down to the soil surface where the crabgrass seed is germinating.
  • Do not de-thatch or aerate the lawn after applying the herbicide, as this disruption will break the chemical barrier.
  • Wait two to four months to re-seed the lawn after applying.
  • Repeat this same procedure year after year.
  • Keep you and your lawn safe. Always follow the manufacturers’ instructions.
crabgrass

Deterring Deer

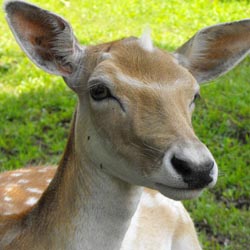
Deer may be beautiful and elegant, but they aren’t always welcome in the garden. Even just a few visiting deer can tear up a landscape, eat an entire crop, destroy a carefully cultivated bed and cause other havoc, such as creating a traffic hazard, damaging bird feeders or leaving behind unwanted “gifts” on sidewalks and pathways. But how can you keep deer out of your yard and away from your garden and landscape?

Popular Deer Deterrent Techniques

People try all sorts of home-grown methods to keep deer from destroying their landscape and gardens. Some of the more common tactics include…

  • 8 ft. fencing, including wire or electric fences
  • Big, loud dogs on guard in the yard
  • Deer repellents such as commercial chemicals
  • Predator urine or other anti-deer scents
  • Motion detectors connected to lights or sprinklers

All of these methods work but are limited in their effectiveness. Fencing is costly and unsightly. Repellents and urine wash away. Sprinklers or lighted areas can be easily avoided. So what can you do to keep deer away permanently?

Deer are creatures of habit and they are easily scared. Anything you can do to mix up their habits or make them think there is danger nearby might be enough to make them go elsewhere in search of food. But deer aren’t foolish and if they realize the danger isn’t real, they will return. Therefore, you must rotate any scare tactics you try and reapply repellents frequently. This can be a lot of work to keep your garden safe, but you can make your garden do the work for you.

Plants Deer Won’t Like

While deer in large herds with insufficient food will eat almost any garden vegetation, particularly in harsh winters, you can opt for plants that aren’t popular with deer to minimize deer damage. At the same time, avoid planting favorite deer plants, such as azaleas, rhododendrons, yews, roses, Japanese maples, winged euonymous, hemlocks and arborvitae, as well as any edible garden produce.

So what can you plant in your landscape to discourage deer? There are many attractive plants deer will avoid, including…

Trees

  • Chinese Paper Birch
  • Colorado Blue Spruce
  • Dragon Lady Holly
  • Douglas Fir
  • Japanese Cedar
  • San Jose Holly
  • Serviceberry
  • Scotch Pine

Shrubs & Climbers

  • Barberry
  • Bearberry
  • Blueberry Elder
  • Boxwood
  • Caryopteris
  • Common Buckhorn
  • Creeping Wintergreen
  • European Privet
  • Japanese Andromeda
  • Japanese Plum Yew
  • Leucothoe
  • Rose of Sharon
  • Russian Olive

Try using these less deer-friendly plants to create a dense border around your yard and garden area, and deer will be less inclined to work their way toward the tastier plants. When combined with other deterrent techniques, it is possible to have a stunning landscape without being stunned by deer damage.


deer_1

Feeding Birds in Winter

Winter is a crucial time for birds. As temperatures drop, there are no insects to eat and the natural seeds are covered with snow, and as the season lengthens, the berries and crab apples are long gone. Birds need enough food to maintain their body temperatures and must search for food from sun up to dusk. If you provide nutritious options at feeders, birds will flock to your yard all winter long.

Best Foods for Winter Birds

Fatty, high-calorie foods are important for winter birds. Fat is metabolized into energy much quicker and more efficiently than seeds to help them maintain their high body temperature necessary for survival.

A number of backyard foods are excellent sources of quick energy and protein to nourish winter birds, including…

  • Suet
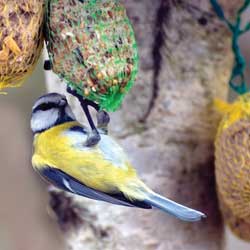
    Suet cakes provide an excellent energy source for birds and are often mixed with seeds, berries, fruit and peanut butter to appeal to a wider range of species. These fatty cakes are easy to add to cage or mesh feeders, or suet balls, plugs, shreds and nuggets are also available.
  • Peanut Butter
    Peanut Butter is also very popular with a large number of birds. To reduce the cost of feeding peanut butter, you can melt it down and mix it with suet or mix in cornmeal so it is not quite so sticky. Smear peanut butter on pine cones and hang them for fast, easy feeders.
  • Seeds
    When native seeds may all be eaten or hidden under snow, seeds at feeders are very important. Seeds contain high levels of carbohydrates that are turned into glucose to help with the bird’s high energy demands. They also are a good source for vitamins and some protein. Make sure the seed you purchase does not have a lot of fillers (milo and wheat seeds) that are not eaten. Mixes with sunflower seeds and millet are preferred.
  • Sunflower Seeds
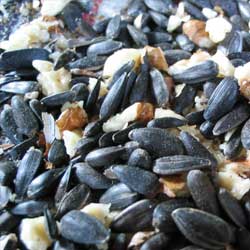
    If you want to offer just one seed to birds, you can’t beat sunflower seed. Black oil sunflower seeds have a softer shell than the striped seeds and can be eaten by sparrows and juncos, as well as cardinals, finches, jays and many other birds. These seeds have a number of advantages: they are not overly expensive, they appeal to a wider variety of species and they contain a larger amount of vegetable oil to help supply the energy birds need to maintain their body heat in the winter. They are also a good source of protein.
  • Cracked Corn
    Cracked Corn is a good, inexpensive food that appeals to a large number of birds, including doves, sparrows, juncos, quail and cardinals, as well as starlings and grackles. Sprinkle the corn liberally right on the ground for larger ground-feeding birds to enjoy.
  • Nyjer
    Nyjer (thistle) seeds are small, oil-rich black seeds typically offered in tube feeders or fine mesh feeders small birds can cling to as they feed. These seeds are tiny but they pack a huge punch for oil and calories, ideal for winter feeding. Nyjer is a favorite of goldfinches, pine siskins and redpolls.
  • Nuts
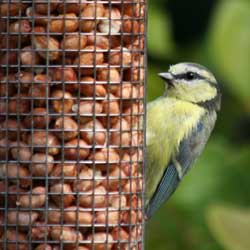
    Nut meats are highly nutritious and provide necessary amino acids and protein a bird’s body cannot produce. They also have oil and are high in energy. Peanuts are the most popular nuts to offer to backyard birds, but walnuts are also a good option. Avoid using any nuts that are salted or seasoned, however, as they are not healthy for birds.

Other Winter Feeding Tips

Just providing food for winter birds isn’t enough to help your feathered friends stay well-nourished during the coldest months of the year. For the best feeding…

  • Position feeders 5-10 feet away from bushes and shrubs that may conceal hungry predators.
  • Use broad baffles to keep squirrels off feeders and to shelter the feeders from snow and freezing rain.
  • Refill feeders frequently so birds do not need to search for a more reliable food source, especially right before and after storms.
  • Use multiple feeders so you can offer a wider variety of different foods and more aggressive birds cannot monopolize the feeder.
  • Provide water in a heated bird bath so thirsty birds do not have to use critical energy to melt ice and snow to drink.

Feeding birds in the backyard can be a wonderful winter activity, and if you offer the best, calorie-rich foods birds need, you’ll be amazed at home many birds come visit the buffet.

feeding-birds-winter-2

feeding-birds-winter-3

feeding-birds-winter-1

Feng Shui in the Garden

fengshui-3

Feng Shui is the ancient Chinese philosophy that believes in attracting and guiding the flow of cosmic energy to influence your health, wealth and happiness. If you are already familiar with Feng Shui, you should know that it is assumed by many that the same fundamental principles that apply to your home also apply to your garden, maybe even more so since the energy in your home is brought in from the outside.

Feng Shui means ‘wind’ and ‘water.’ According to Chinese tradition, everything in the world contains ch’i, the cosmic life force. Ch’i means to flow freely like wind and water, but it is alleged that its movement can be blocked or trapped. This, it is believed, can cause disharmony or misfortune in your life. The movement of ch’i is thought to be influenced by several things such as colors, shapes and sound. The purpose of Feng Shui is to ensure that ch’i is flowing smoothly and gently without being allowed to stagnate or move too quickly. This harmony in your environment is understood to create harmony in your life.

Bringing Harmony to Your Garden

Feng Shui starts with basic gardening maintenance. Ch’i is believed to stagnate in areas where junk accumulates. Clean up your patio or deck and screen your garbage cans from view. Throw away any broken pots, planters or tools. Good cultural practices are also considered important in the flow of ch’i. Mow your lawn, pull up weeds, edge your beds and remove dead plants. Prune any broken or damaged limbs, stake plants and take steps to control insects and disease.

Ch’i requires smooth curves to flow. It is funneled by straight lines but impeded by sharp angles. It does not need to be costly or time consuming to remedy these types of structural problems. A straight walkway can be softened with the addition of curved beds on either side. You may also try planting perennials that mound or spill onto a walkway to break up straight lines. To help ch’i flow gently around corners, consider the addition of a tree, shrub or climbing vine. A curved bench or fountain is another option.

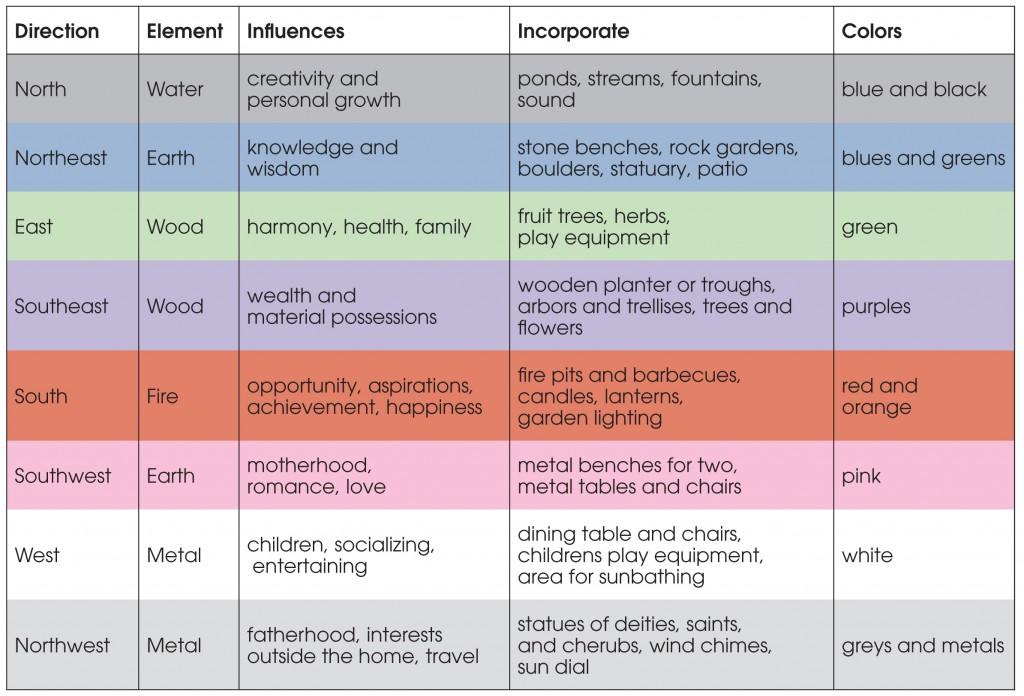
Bright colors, especially red, are used in Feng Shui to attract ch’i. Poor Feng Shui, it is believed, is remedied by placing the five elements recognized by the ancient Chinese – wood, fire, earth, water and metal – in their appropriate direction to beneficially affect the movement of ch’i.

Why not try some of the elemental remedies below in their appropriate directional orientations? They may assist with the flow of ch’i in your garden and perhaps you will reap the benefits of good fortune Feng Shui reportedly imparts.

Feng Shui Remedies
fengshui

fengshui-3

fengshui-1

fengshui-2

Dormant Pruning With the Proper Tools

Late winter pruning is often recommended for many trees and shrubs. Pruning the plants while they are dormant is less stressful for the plant and it’s also easier to view the structure of deciduous trees and shrubs without leaves to ensure the pruning helps create the desired shape. It’s also a time of the year when late winter sunshine makes us all long to be in our gardens and pruning is an excellent job to get us out there.

Pruning Tools

To get out and get pruning, you will need the proper tools. There are several types of pruners that should be in every serious gardener’s tool shed.

  • Hand Pruners
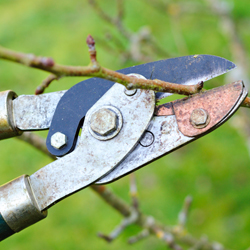
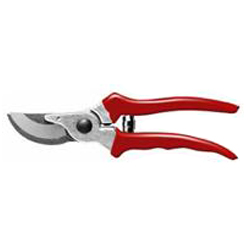
    The simplest tool, but the hardest to choose, is the hand pruner. There are two distinct styles of hand pruners: the anvil type and the bypass. The anvil pruner is good for pruning deadwood or undesirable growth. For more valuable specimens anvil pruners tend to smash the wood during cutting, leaving the wound open to insects and disease. Bypass pruners are like a pair of scissors and give you an easier, cleaner healthier cut. Different hand pruners are available in different sizes and grip styles, including options for both right-handed and left-handed gardeners. To get the best results, it is important to choose a hand pruner that feels comfortable but still provides adequate strength for the job.
  • Lopping Shears
    Another tool that comes in handy is the lopping shear. They are used for making larger cuts up to 1-1/2″ in diameter, and have longer handles to provide more power without stress or strain. The longer handles also provide a better reach than hand pruners. They are also excellent for clearing away undesirable growth in your yard, including trimming hedges.
  • Pole Pruners
    The last tool you’ll need is a pole pruner. It is a combination lopping shear and pruning saw. The pole pruner extends out to twelve feet and can be used for making small cosmetic cuts or larger limb removals without needing to set up a ladder. Pole pruners are also useful in dense canopies when using a ladder would not be practical or suitable.

To learn more about pruning specific trees or shrubs and to choose the appropriate tools for the job, please stop in or give us a call. We’ll be happy to help you be sure you are equipped to make clean, appropriate cuts that will help your trees and shrubs look their very best.

dormant-2
dormant-1